Line25 is reader supported. At no cost to you a commission from sponsors may be earned when a purchase is made via links on the site. Learn more
Follow this step by step Adobe Photoshop tutorial to create a colourful and vibrant cloud icon. We’ll be using plenty of gradients and lighting effects to produce a really cool icon perfect for a modern website design or mobile app.
![]()
The cloud icon we’ll be creating features plenty of vibrant colours to create a three dimensional appearance. A flow of purple to blue provides the colourful base while the highlights help illuminate the icon and lift it from the screen.
View the full size icon design
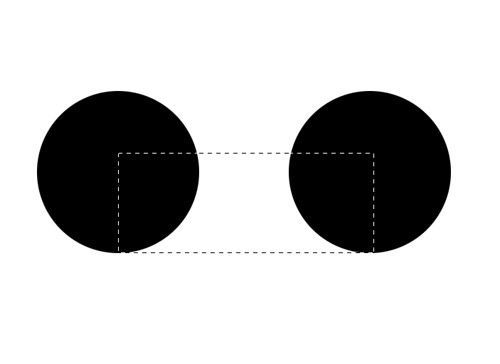
Open up a new Photoshop document and begin by filling a black circle with the elliptical marquee tool on a new layer. Hold Shift and move the selection to one side and fill a copy, then use the rectangular marquee tool to fill in the centre while aligning the bottom edge perfectly.
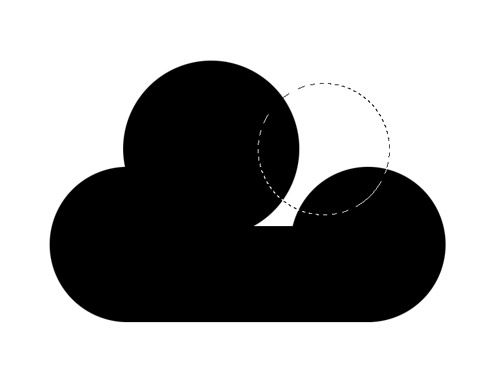
Back with the elliptical marquee tool, draw a slightly larger circle and a slightly smaller circle each overlapping the original left and right circles.

Fill in any gaps in the centre to finish off the graphic as a recognisable cloud shape.
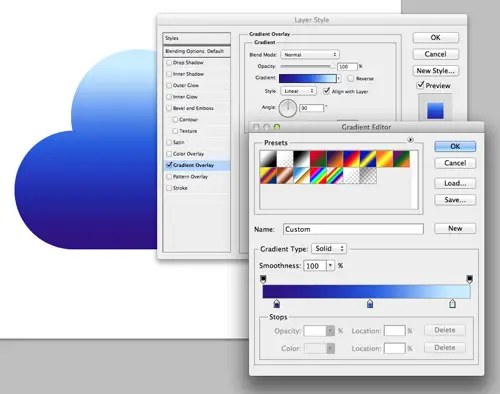
Double click the layer to open up Photoshop’s layer styles window and add a Gradient Overlay. Add a third swatch in the middle then change the colours to #300a85, #2555dd & #c8ecff. When choosing colours, avoid selecting tones from the same hue. Instead, move around the colour wheel to create more intense changes in colour, so the tones become warmer or cooler.
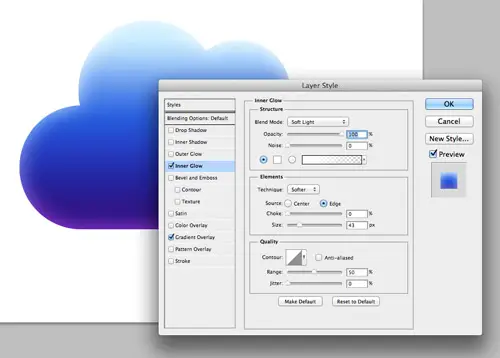
Give the cloud an Inner Glow effect to add to the three dimensional appearance. Change the settings to white, Soft Light and 100% opacity, then play around with the size slider.
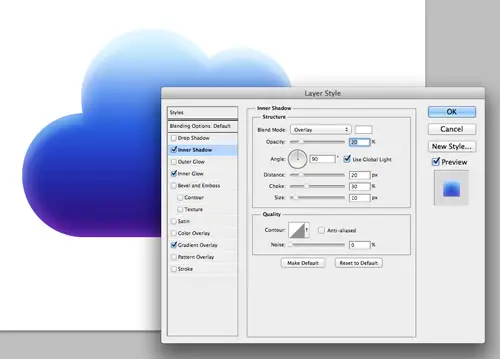
An Inner Shadow effect can be converted to create a cool top highlight. Change the default fill from black to white, then alter the blend mode to Overlay to allow the colours to interact. Adjust the Distance, Choke and Size to balance between a hard/glossy highlight and a smooth/soft highlight.
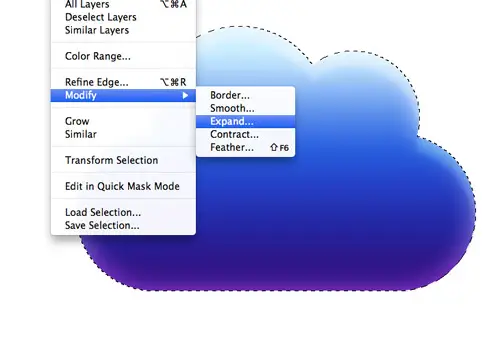
Press OK to confirm the layer styles, then CMD+click the cloud layer thumbnail to load its selection. Go to Select > Modify > Expand and enter 5px.

Fill this new selection with black on a new layer underneath the main cloud to create an outline effect.
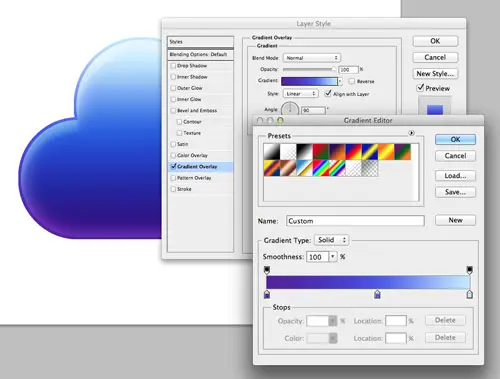
Open up the layer styles for this black outline and add a Gradient Overlay. Choose similar purples and blues, but enough change in tone so they contrast against the cloud layer. I’m using #571a9b, #4c54e5 and #c0e8ff.
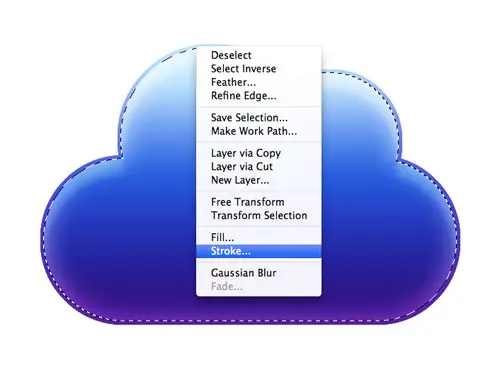
Load the selection of the cloud layer again, then right click and select the Stroke option on a new layer.
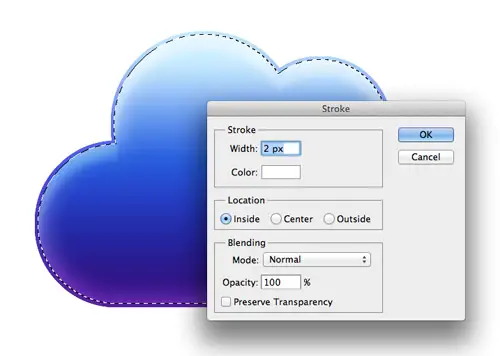
Alter the stroke width to 2px using white as the colour, then make sure the Location is set to Inside.

Use the Eraser with a large soft brush setting to delete the lower portion of the stroke outline, leaving a gradual fade from top to bottom. This little touch adds another subtle highlight to the icon.
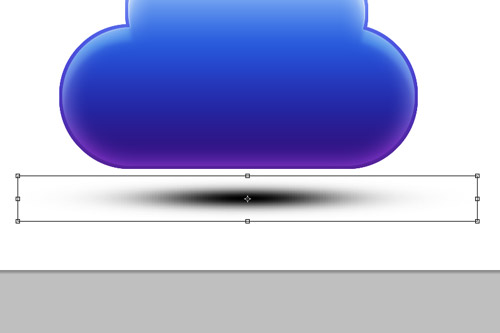
Dab a spot of black on a new layer at the bottom of the stack, then transform and squash it down into more of a shadow shape.

Split the shadow in half using the marquee and selection tools. Hold Shift to make sure the second half stays on the same plane.
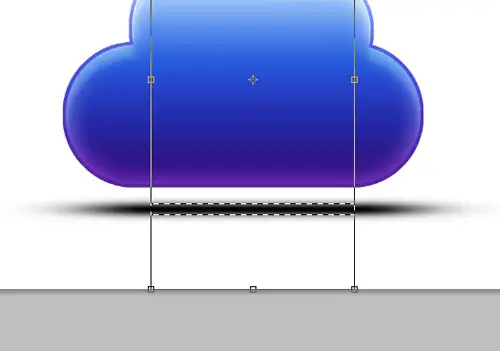
Use the Single Column marquee tool to make a selection, then transform and stretch this selection to fill out the centre area of the shadow with a straight segment.
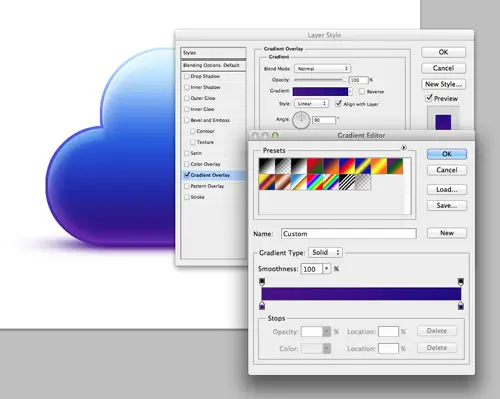
Move the shadow into place under the cloud to ground it onto the background, then add another Gradient Overlay in the layer styles window. Use darker tones of blue and purple to continue the colours into the shadow. A shadow in reality isn’t black, it is made up of all the colours and reflections that are around it.
![]()
Our vibrant cloud icon is now complete. The gradients and highlights really help create a three dimensional appearance, while the variations in colour subtly give a more realistic feel to the shading.
Comments are closed.