Line25 is reader supported. At no cost to you a commission from sponsors may be earned when a purchase is made via links on the site. Learn more
Photoshop is the go-to software for all designing requirements, be it individual projects or professional assignments. Many features help transform an image into a more usable version of itself. One such modification option is Adjustment Layers in Photoshop.
Adjustment Layers refer to the process of using a powerful set of a group that is useful for non-destructive image editing. Moreover, it allows you to add color and make tonal adjustments to an image. And it doesn’t even make any permanent changes to the picture’s pixels.
The most known advantage of using Adjustment Layer is using it; you don’t need to worry about losing the original picture. It allows you to edit, discard or restore your adjustments at any given point of time. This helps to make the workflow more efficient and flexible.
Other than this, it helps fix exposure and brighten portraits. If the image is underexposed, you can correct it using adjustment layers by brightening the shadows on a subject’s face. On the other hand, if you need to recover details from slightly overexposed skies, adjustment layers can be used to.
Adjustment layers are also used for advertisement for web and print. Adjustment layers are used in several instances to create layouts for posters and ads. You can use it to change the color of anything. Other than that, you can use adjustment layers to correct and color grade.
Now that we have briefly covered the benefits of using Adjustment Layers in Photoshop, let us understand how to use them:
1. Adjust Contrast/Brightness:
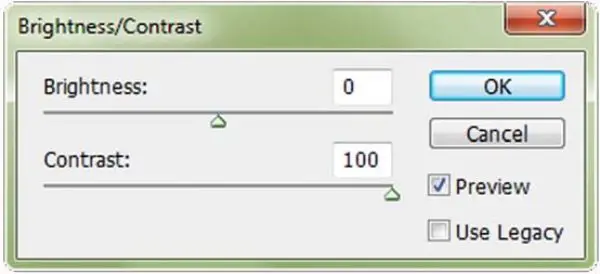
By making adjustments to the contrast and brightness of the image, you can affect the tonal range of the image. Brightness Slider helps to adjust the highlights of the image, whereas the Contrast Slider helps to make adjustments to shadows of the image. Changing these helps set different moods to the image.
2. Use Levels:
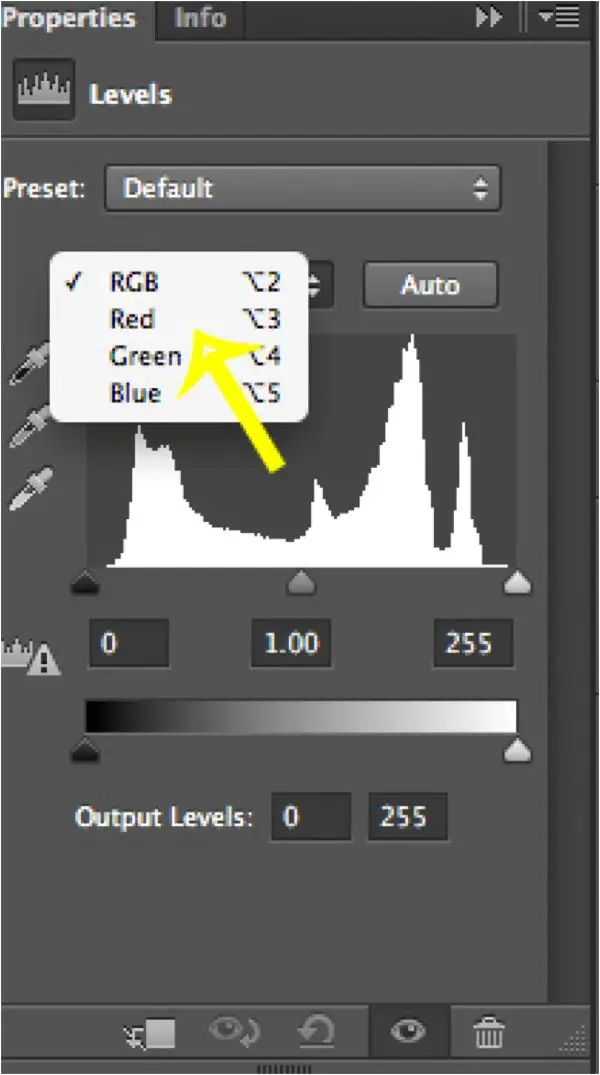
Levels let a user modify the tonal values of an image further. This is done by adjusting the levels of mid-tones, shadows and highlights. Levels are often the most frequently used tool in the adjustment layer panel. Using a hint of levels can also bring significant changes to your image.
3. Understand Curves:
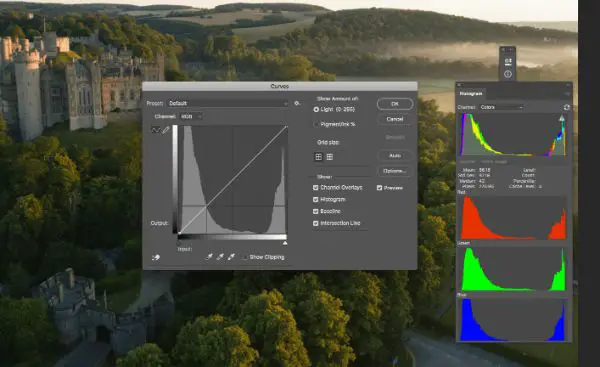
Using Curves is one of the strongest and most flexible methods of adjusting the tonal range of an image. It allows you to add as many anchors as needed throughout the image. The Curves tool is also one of the most precise tools for tonal range modification. Pressing on curve adjustment would show you a diagonal line on a graph. This graphic representation of your image’s tonal range helps understand the image much better. On the x-axis, it shows the original values of the image, whereas the y-axis shows the new adjusted values. Both axes have a gradient strip from black to white that represent the tonal range of the image.
You can increase the overall contrast and quality of the image by clicking to add points on the line of the graph. After adding a point, you would be able to drag it up or down using your mouse. If you pull it down, it darkens the image, whereas pulling it up would brighten it. You can add two points and use one of them too bright out the highlights and the other to pull out the shadows of an image by pulling one point up and other down. This would create a slight S curve.
4. Set the right Exposure:
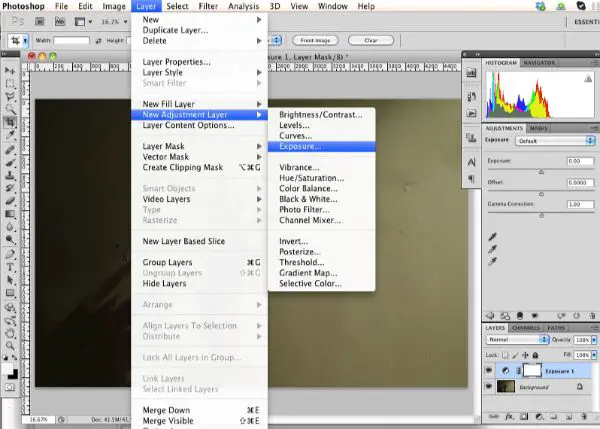
For any image to look good, its exposure needs to be right. Depending on the mood, the exposure should be set in a way that brings out that mood. A well-exposed photo doesn’t necessarily mean a neutral image; it can be manipulated to be a low-exposed picture or a high-exposed picture. The only thing is to be cautious about the detail of the images. Ensure it isn’t compromised upon when we experiment with exposure. Adobe Photoshop allows setting or adjusting Exposure with three sliders- Offset, Exposure, and Gamma. Offset focuses on mid-tones, Exposure would modify the highlights and Gamma helps to adjust the dark tones specifically.
5. Changes in Vibrance:
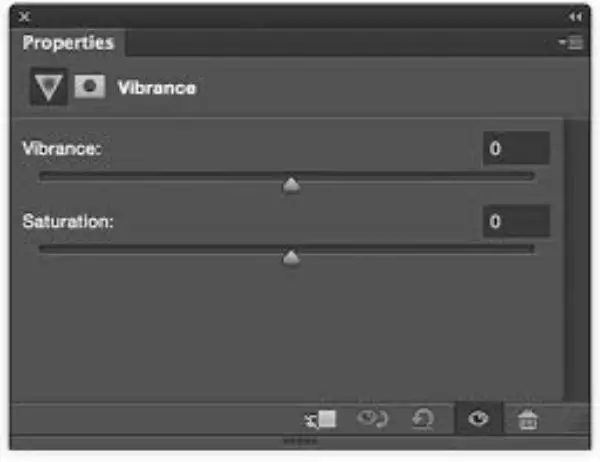
Vibrance is changing the tones for the muted colors, skin tones and already saturated colors alone. Using the Adjustment Layer allows you to modify the vibrancy of an image in two methods. There is a Saturation slider that affects all colors of the image. The other Vibrance Slider is more accurate to its name; it also affects the saturation of the colors. However, it is more selective and focuses on the least saturated colors, also avoids oversaturation of skin tones.
6. Changes in Hue/Saturation:
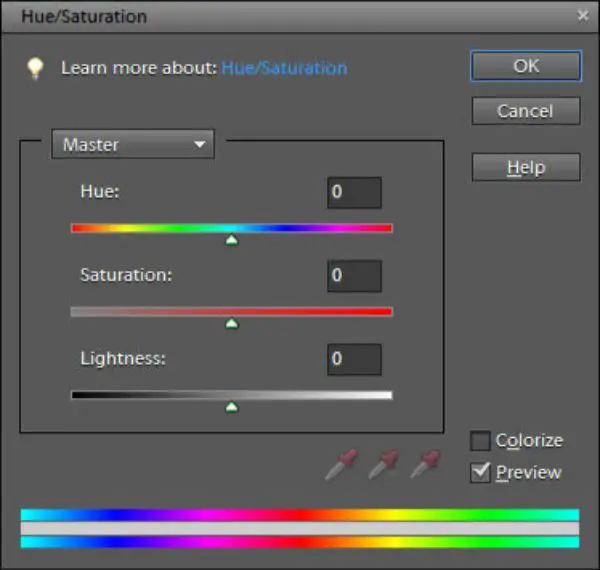
Hue and Saturation allow you to adjust Hue, Saturation and lightness of the entire image. You can also use it selectively for a specified of colors in the image. You can adjust the sliders to either increase the saturation of the entire image or use a preset from the drop-down menu. One of the options, for instance, is Greens. If you select greens, the tool would look for all green color elements in the image and reduce the saturation of those elements specifically. Green is generally not very soothing to the eye; hence lowering its saturation can give the overall image a better feel.
Generally changing the overall saturation of the image is not a good idea. It reduces the overall tonal range. Targeting the saturation of specific colors gives you greater control of the image editing experience. This can also help to colorize the grayscale images.
7. Color Balance:
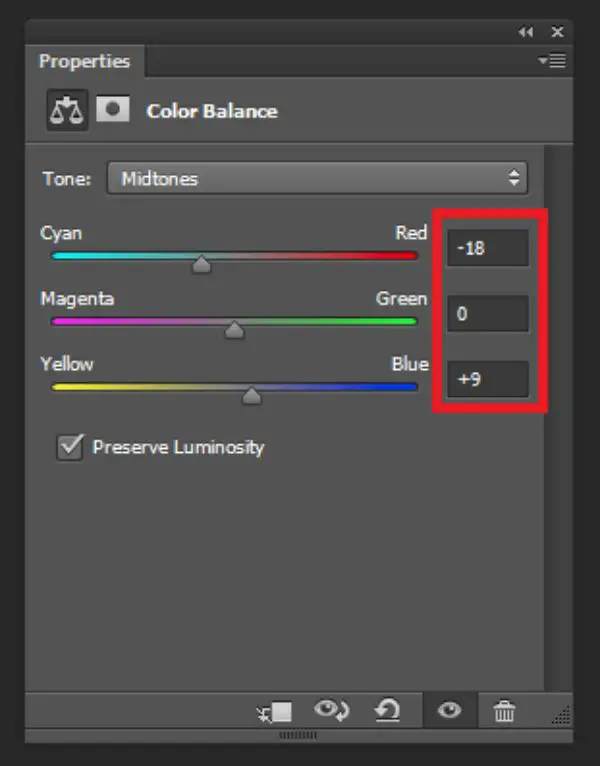
Color Balance allows the user to manipulate the mixture of colors in an image. For instance, in this image, the selection of the butterfly’s wing and adjusting the color balance sliders brings out the red and magenta tones in its wings.
8. Adjustment in Black and White:
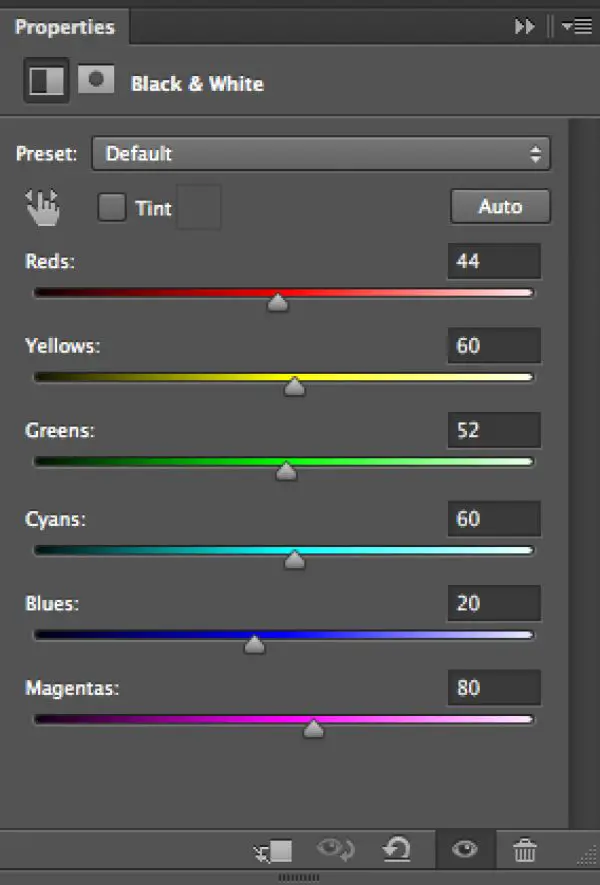
Black and White adjustment option allows you to make grayscale versions of the images. The left image is the default setting. To the right, the image preset is changed to Custom. This allows changing sliders that in turn gives more control over how the reds in the wings of the butterfly were converted to black and white.
9. Using Photo Filter:
Photo Filter adds a different color filter as a layer on top of the original image. Keep the Preserve Luminosity box is kept checked. Just by adjusting the density slider, the intensity of the effect filter on the image would change. Another option is to customize an individual color filter. To do this, you can double click the color swatch from the properties panel. Then you can adjust it by the Color Picket window that would pop up.
10. Understand the Channel Mixer:
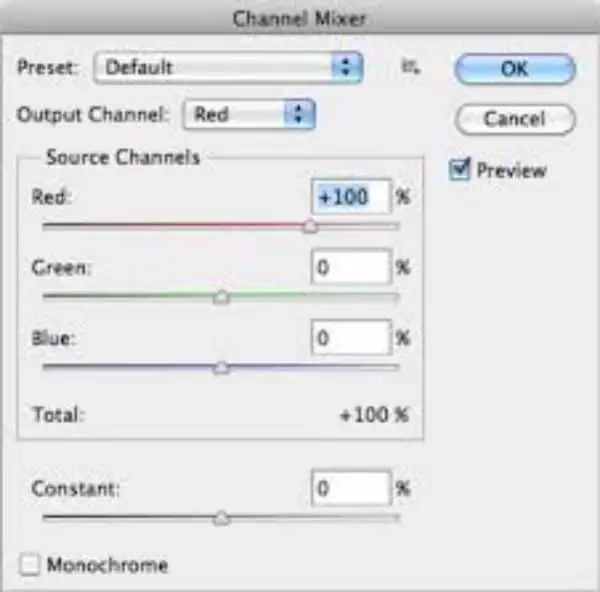
Channel Mixer helps the user to modify the colors of the image. It can be used for creating grayscale and tinted images. To the image on the right, the red channel is used for bringing out a red tint in the image. For the image on the left, the Monochrome box is checked. Then adjustments are made to the sliders for ensuring better color conversion to grayscale. Keeping the channel on 100% gives you the best results.
11. Color Lookup:
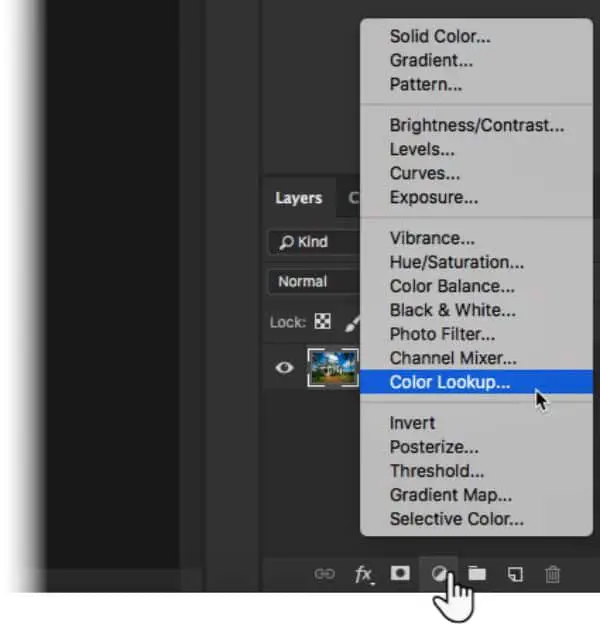
Color Lookup is an adjustment that has many prepackaged looks for you to apply to the image you’re working on. There are three different options- Abstract, Device Link and 3DLUT File. All these options load the image in a different look. Each look is made by remapping the colors in the image with the help of a lookup table (LUT). This creates pretty exciting effects, and Photoshop allows you to make your LUTs if you use Adobe Speedgrade.
12. Making use of Invert:
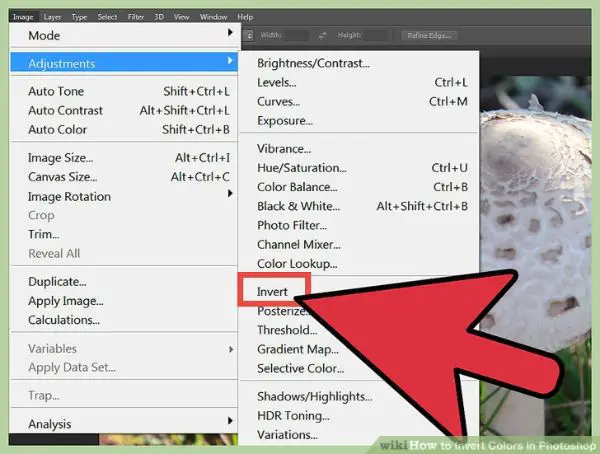
Inver adjustment layer helps bring out the negative effect by inverting the colors of the image. Inverting color is essential when you’re working on client projects at times. To invert the color of an image, simply open the window menu, select layers and reveal the layers panel. Now using any selection tool like Marquee, Magic Wand or Lasso make a selection that you wish to invert. If you wish to invert the entire image, you need not make any selection. Now you can click on create new fill or adjustment layer button and choose invert from the drop-down menu. Now you can drag the inverted layer up or down the layers stacks to bring it to a new position.
13. Posterize effect:
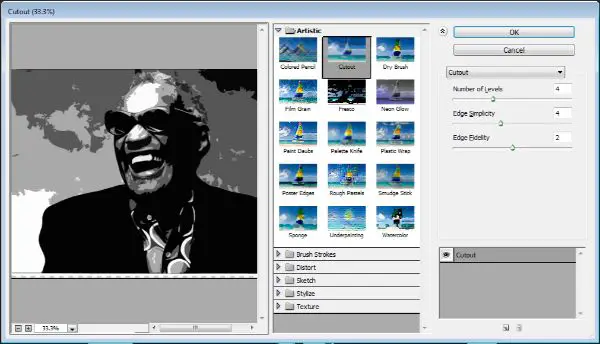
Posterize effect helps produce a flat poster-like appearance. It does so by reducing the brightness value numbers in the image. To posterize photos on Photoshop, you can go to the adjustment panel. Using Posterzie effect allows you to specify the number of brightness value using a slider.
14. Changing Threshold:
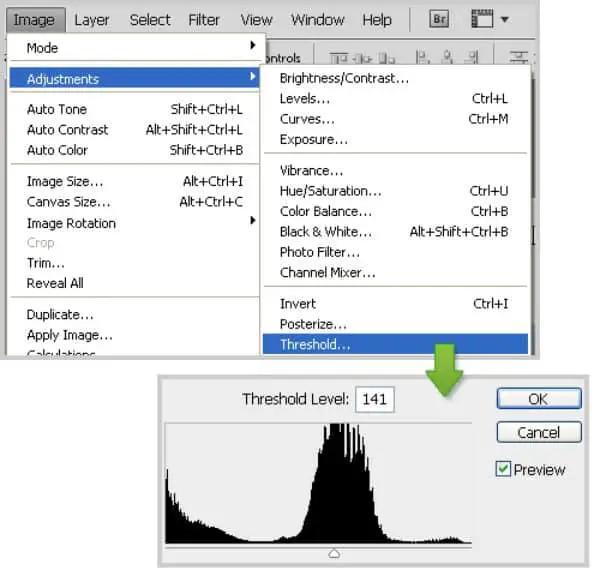
The Threshold tool converts the image to black and white. For instance, the flower is selected individually to change the threshold values of the flower only. Increase or decrease the Threshold controls, for manipulating the number of pixels turning black or white.
15. Using Gradient Map:
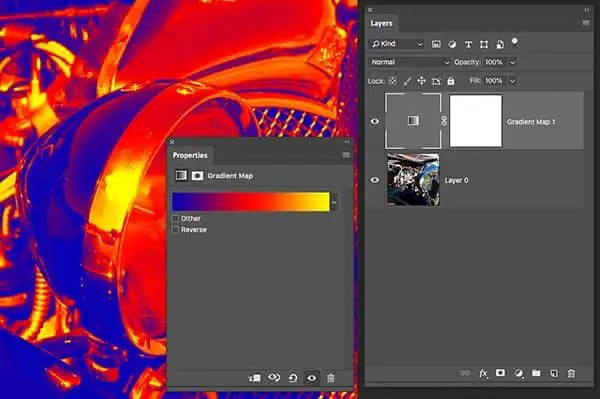
This tool allows the grayscale range of an image to a custom gradient fill. It comes with different gradients that you can adjust as per you want, by using the gradient editor window. If you check the reverse box, it inverts the colors of your gradient.
16. Selective Color Adjustment Layer:
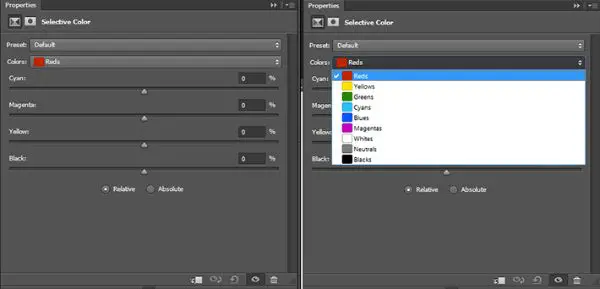
Selective Color adjustment layers allows to selectively modifying the amount of a single primary color without affecting the other primary colors in the image. For instance, there is a lot of red in the image , hence if we select red in the drop-down menu as the color that we want to change; it would adjust the values for that color. Then you can drag the slider around properties panel for decreasing or increasing the components for the reds in the image. Hence you can change an image’s reds without changing greens of the photo. This is a very specific tool for precise editing and is generally used for skin tones corrections.
These are the several tools for adjustment layers that you can use to refine images in greater depths to bring out the true potential of an image or to change it in a way that suits the purpose. Each of these techniques is great to master, as all of them are non-destructive editing techniques. With repetitive practice, you can master each adjustment layers to their full potential. There is a lot more to do with adjustment layers that you can explore as you practice.