Line25 is reader supported. At no cost to you a commission from sponsors may be earned when a purchase is made via links on the site. Learn more
It can be overwhelming to modify the Adobe Lightroom application images if you are doing it for the first time. The application can come across as very complex and intricate for a beginner. Understanding the necessary steps that you have to implement and export an edited file isn’t a challenging task, though. If you are not yet used to Adobe Lightroom, you can take it for a spin for seven days. They offer a free trial period of seven days so that you can get used to the look and feel of the software.
We understand the anxiety that comes when you have to get used to something that is very new to you. As such, we have created this blog with the idea in mind that these Adobe Lightroom hacks can be used to master certain common tricks. This Adobe Lightroom guide also includes keyboard shortcuts along with some advanced tips to master the art of image editing. Let us dive deeper.
1. Auto-Advance option:
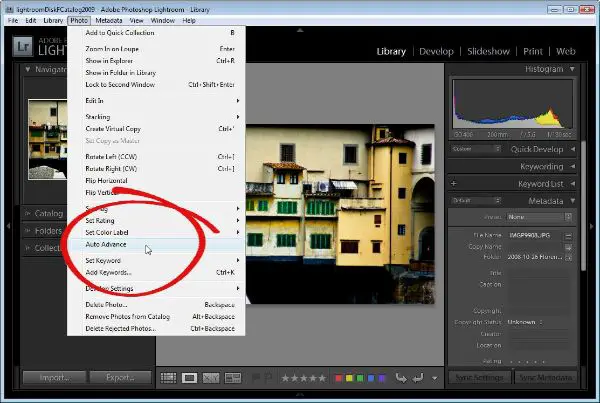
You don’t have to go back and forth the files using arrows. As you switch on the Caps Lock by tapping the Caps Lock key on the keyboard, it opens up the adjacent file. This happens only after you rate the current file. Hence, offering a rating to the current file is essential.
The technique for the initial step is merely selecting a yes or a no. In terms of the Adobe Lightroom, it turns to Flag [P] and Flag [U]. After that comes the star rating, which ends with the selection of the files that you want to modify.
2. Hiding panels:
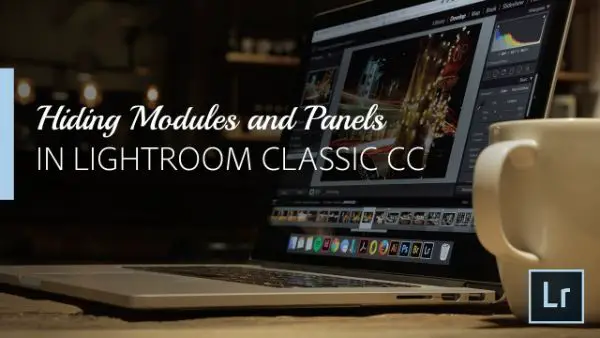
When you are culling the images, it is essential to get a neat and impeccable interface to begin working with. But you should also be allowed to quickly look at the specifications of the image like ISO, Aperture, Shutter Speed, and more. Instead of taking up an entire screen to view it, use the Tab key on the keyboard to switch between the view of panels in presence or absence of them. To see the image without panels above and below, press the Shift + Tab keys.
3. Creating various types of collections:
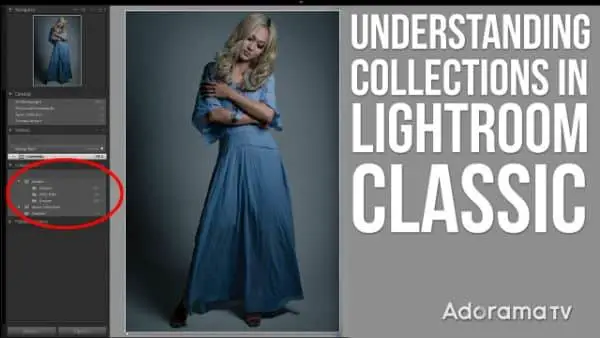
Collection is a life-changing hack of Adobe Lightroom, and if you have not used this hack yet, it is about time to start using it. So how do you define a collection? You would say a collection is an organized view of folders, subfolders, and files within. This is absolutely correct. Generally, these folders, subfolders, and files are arranged using date, location, or names. And these are the best ways to organize the files for easy reference and understanding.
A collection panel is an added feature to the above description. When it comes to collections, you arrange the files using specific parameters. For illustration, you can build a collection using the subject of the file, like a boat, flowers, and others. There are endless possibilities when you begin using collections. Adobe Lightroom offers two different types of collections that you can use according to your requirement. Let us look at both of them:
a. Smart Collections:

The Collection Panel can be found on the left side of the Adobe Lightroom screen. But the right place to build collections is from inside of the Library Module. Moreover, it is the only active panel in the entire Adobe Lightroom software. As you tap the plus symbol, a menu falls. Tap Smart collections in it. Now specify the file type you need in the Collection.
There are so many options to explore when you start using them to create smart collections. You can build Smart Collections by the ratings, date, location, focal length, and more. It is also possible to combine two or more parameters to create a more specific collection. Once you have specified to Adobe Lightroom the type of Collection you want to build, tap create, and your Smart Collection gets created in a moment.
b. Customized Collection:
The correct way you should be using Collections is this. You can collect images for blogs, a course you are building, or a guide you are writing about. Again, to create a new collection, start by pressing the plus symbol. But here, once you select the Collections, give it a title and press the Create button in the menu. This creates an empty collection. Now, you have to drag and drop the files in the Collection that you just created.
It is a wise step to create a Collection Set when you are dealing with numerous Collections. You can have different collections that have a common factor amongst them and put them under a specific Collection Set. The Set is only another term for the common term called folders that we generally use in day to day lives. Bear in mind that the files inside that Collection is similar to the shortcut to the image in the real folder. Adobe Lightroom doesn’t create multiple copies of the same file as you add it to a Collection. But it builds a shortcut to it, which means that the changes made to the shortcut are also reflected in the original file.
4. Addition of logos:
![]()
This one is a very useful hack for Adobe Lightroom. It is possible to add a logo at the top bar or even edit your name. Adobe Lightroom is made to display your Account number from Adobe on the top of the window. Hence, if you need to display a logo or your name, you can do it with individual settings available within the application.
To do this, click on the Adobe Lightroom menu bar on the top and tap Identity Plate Set Up. You can create a personalized Adobe Lightroom interface, which includes changing the fonts, font size, and certain things inside the menu bar.
5. Menu adjustment using Adjust Menu:
The top bar in the Adobe Lightroom application can also be customized according to your requirements. To do this, you have to right-click on the topmost bar. There, uncheck the menus and sub-menus that you don’t use ever.
6. Customizing the Develop panel:
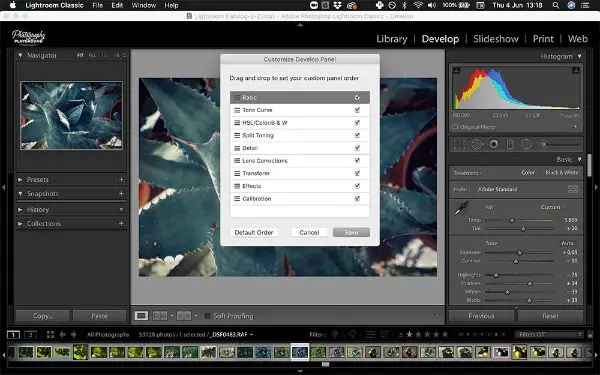
You can customize the Develop panel, which lets you build a flow of editing that meets your levels, needs, and requirements. The software lets you remove the panels that look too much for you or keep the only ones you need.
Right-click in the area beneath the adjustment panel to customize the Develop panel. There, you would be able to see several things. It lets you change the order or deselect the panels that you don’t require to customize the panels.
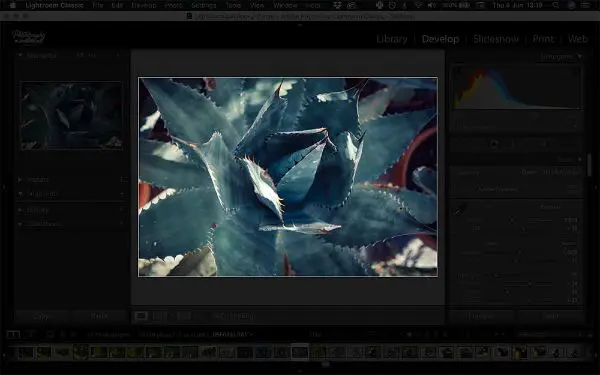
a. Solo Mode:
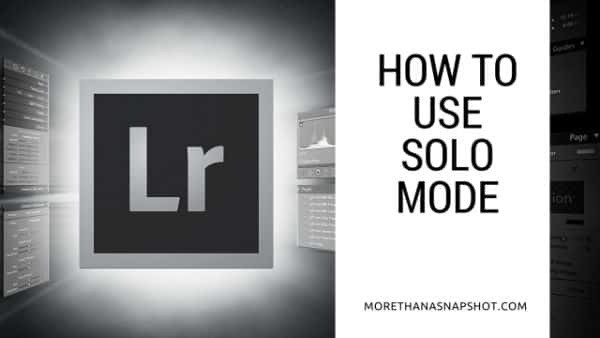
To collapse the panels apart from the one you are working with, use Solo mode. As you open other panel, the former one gets closed. This is great for beginners who tend to get distracted by other panels that are not required. But if you need to switch and toggle between various panels, this mode is not for you. This is because you have to open the panel now and then, which wastes a lot of time.
Moreover, it all depends on the way you edit an image. Some people prefer working with all the open panels so that they can pick up required controls as and when required. Also it is possible to tap Select All and Expand All, which needs no explanation.
7. Viewing without any distractions:
There is a shortcut to seeing an edited image in a mode that is free from Distraction and is named Distraction-Free mode. You can use this mode by simply pressing the L key on the keyboard, and you can view the image without any other distractions.
When you press L for the first time, it offers a dark background, which makes viewing the image. As you press L for the second time, it gives you a pure black background to look at. And as you press the L key for the third time, everything goes back to the original form. You can switch between the previous and next files using left and right arrow keys with this mode.
8. Changing the background color:

It is possible to alter the color of the background that surrounds your image. When it comes to colors, the grey is a very neutral shade available. While you edit the image, this color seems to be the best color for the background. This is because it does not alter the understanding of the colors of the file.
But there are situations when you need to check how colors in the image would look with the white, black or any other background. This is the area where you can see the preview of the image. Although always make sure that you keep a grey background when you are in the process of editing the image.
So, if you want to alter the background color, then right-click in the area that surrounds the file. This opens up a window where you can change the color of your background from grey to any other color of your choice.
9. Precision-based modifications:
When you edit an image using a laptop, you know how tedious and cumbersome the task gets. And working with Develop Panel while using a laptop can be a difficult task. This becomes an issue when you have to work with tiny increments using sliders.
As you hover on the panel that divides the central area, it is possible to pull the line to the left to up the panel width. This offers you additional space within sliders, which provides a lot of precision to work with.
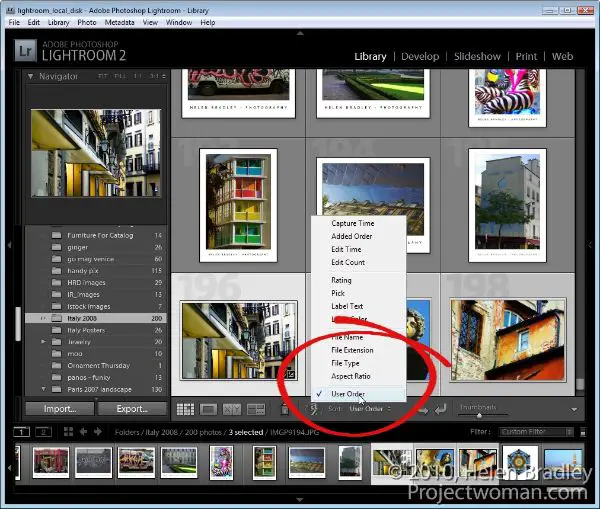
10. Virtually building the Copies:
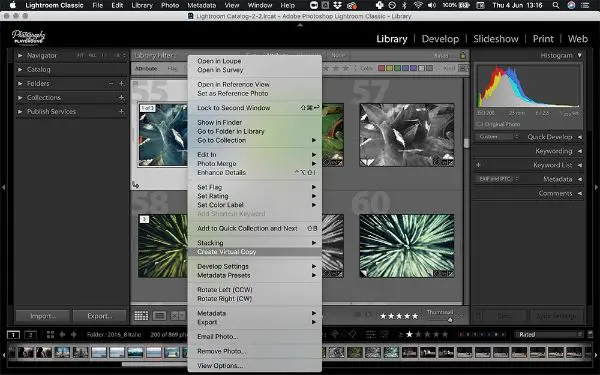
Another unique trick to use Adobe Lightroom to edit an image is to use Virtual Copy. There are so many situations when you want to see how the image appears in B/W. But the artist generally refrains from using that filter or mode for fear of destroying or spoiling the file. To avoid messing with the original file, you can use the Virtual copies feature to generate a virtual copy of the file.
Adobe Lightroom lets you create many virtual copies where each copy has a different filter applied to it. Moreover, the best part is, you can put each virtual copy adjacent to each other and see which one looks the best.
To generate a virtual copy, tap the file, click right button on the mouse, and click Create Virtual Copy.
11. Looking at Before and After modifications:
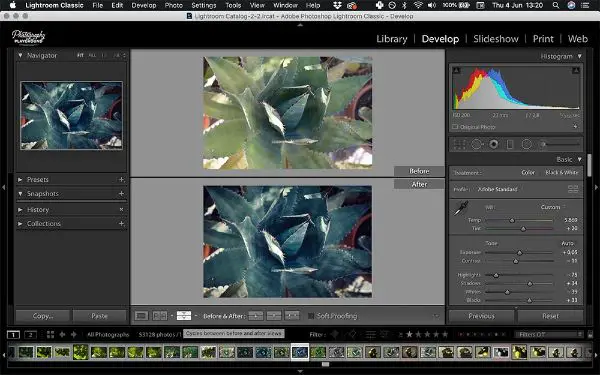
Sometimes, you need to check if the edits are headed in the correct direction during the image editing. And to do this, you need to compare the original image with the edited version of it. For running a comparison between the two, press the Y key on the keyboard or click the YY symbol at the lower end of the screen.
If you are working with a horizontal picture, you can select the top/bottom viewing mode. And if you are working with a vertical image, you can select the left/right viewing mode. You can use \ key, which is another shortcut to toggle between the before and after images.
12. Taking up the view for reference:
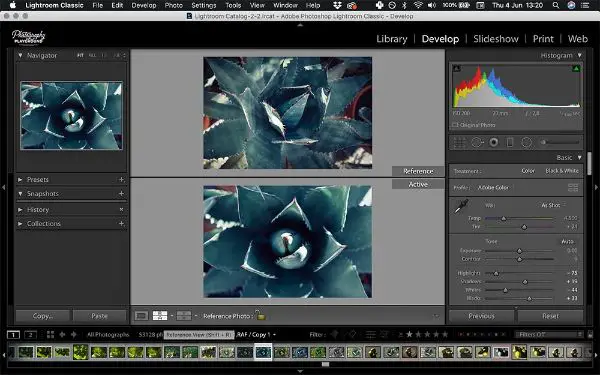
There are situations when you have to switch between the before and after images to make sure that the edits are correctly made. But sometimes, these edits are headed in the wrong direction. With this feature, you can place the image side by side or on top of the other. This can let you see the points that require modifications correctly.
Next to the YY symbol, look for the RA symbol. Here, R signifies Reference, and it denotes the file that you need to keep as a reference.
A means Active. It is the file under work. As you click on that file, it opens the Reference View. Pull the reference file to the reference window area, and choose the file you have to work with to match the reference file. To do this, there is a shortcut called Shift + R from the keyboard.
With this, it is sure that the editing comes out with consistency.
Conclusion:
Adobe Lightroom can be challenging to use when you are a beginner, and you don’t know the intricacies of the application. And editing the images can be a time-consuming task. But the image editing process becomes more comfortable when you know the right tools, their shortcuts, and the understanding of how to use them. This blog focuses on the tips and tricks that you can use when you use Adobe Lightroom to alter the images in various ways.