Line25 is reader supported. At no cost to you a commission from sponsors may be earned when a purchase is made via links on the site. Learn more
Leather text effect is beneficial when it comes to visual graphics. If you wish to be more distinct with your leathery textures, there’s no better way than creating a leather text effect yourself. Applications such as Adobe Photoshop make it easy to customize and craft your leather (or any other material) effects. And what’s more – you can even use these effects to create textual content that will stand out.
In this article, we shall review how to create a leather text effect using Adobe Photoshop. This particular tutorial will guide you about three essential things that one must cover while crafting a leather texture – incorporating leather texture within the text, creating stitches around the leather, and creating a leather drawstring that looks lifelike. Most of the time, when you visualize a leather product, these three things come in handy to make it look more realistic.
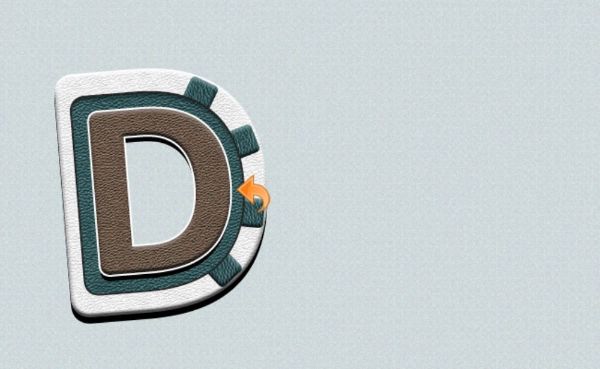
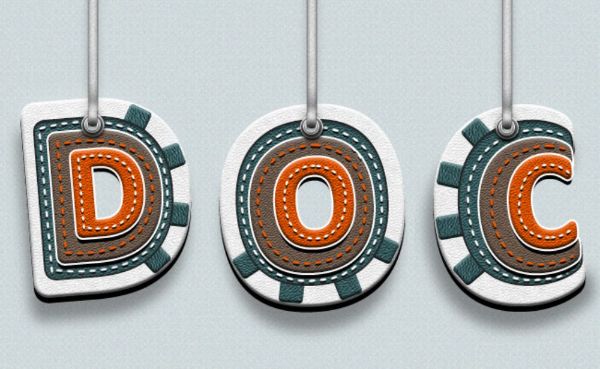
Here is an image that contains three alphabets that have a leather text effect along with the use of drawstrings, light, and shadows as well as stitches around the corner. In this process-based tutorial, we shall learn to create all of these. For reference, you can also download leather textures online that can be used in the design as well.
1. Open a new file:
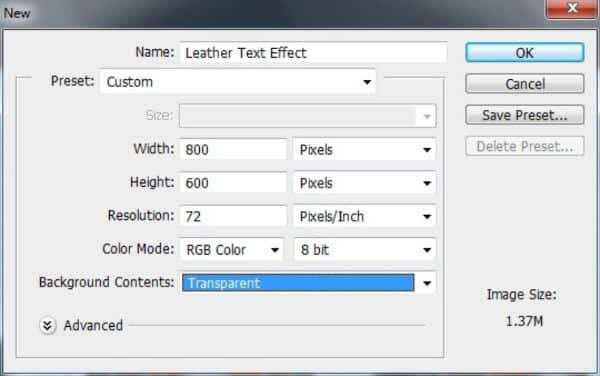
In order to ensure that your final output is of good quality, you must ensure that the canvas size you pick is moderately sized. You can begin with the lowest of 800px by 600px height. This way, each of the effects will be visible and give your artwork a polished look. In case you wish to print your artwork, you can set the resolution to 300dpi. Otherwise, 72 dpi for digital work is sufficient enough.
2. Set a base color:
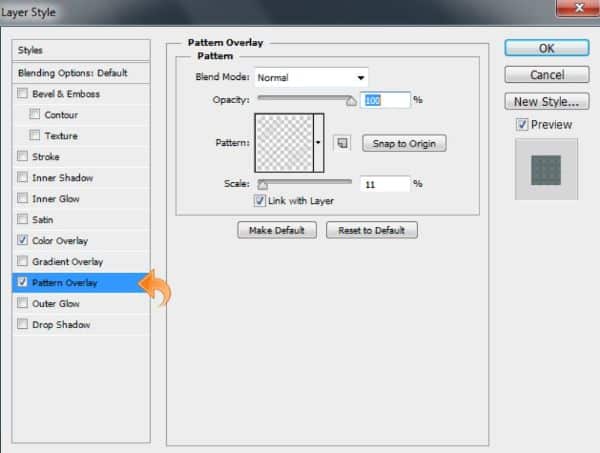
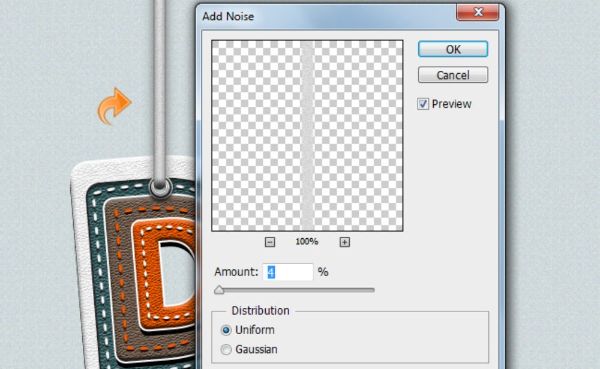
Set a base color for the background, create a new layer, and fill it in with the color #c8d4d7 using a paint bucket. Add about 2% noise to the image via Filters>Noise>Add Noise. Once you finish with the previous step, you can double click on the layer, and a pop up of the layer style shall open up. Go over to the Pattern Overlay section and add a subtle pattern to the frame. This step ensures that there is a rugged base to your texture.
3. Enter the text:

Once you have achieved a base background, you should now fill in some alphabets. Using the text tool, insert alphabets with the color #ffffff. You can slightly tilt or adjust the angles according to your artwork.
4. Add depth to text:

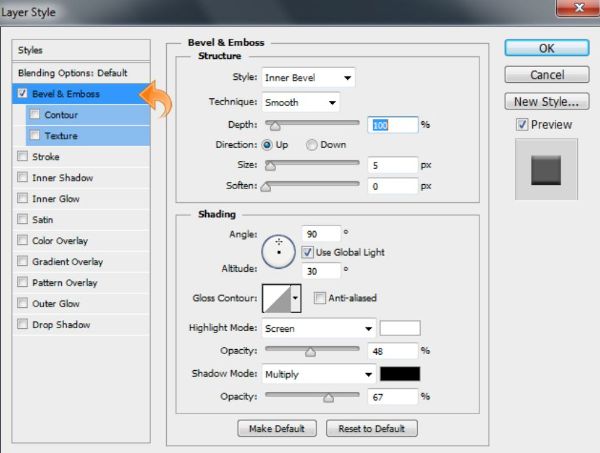
The text you have entered still requires a certain amount of depth to look more realistic. To set up the depth, you can double click on the text layer, and the layer styles window will pop up. Select Bevel and Emboss, and you can adjust the levels as given in the image below. Following this step, you can select the Drop Shadow option and set the options as below.
5. Create a clipping mask:

Open a white leather texture image and place it on top of the alphabet. Create a clipping mask of the text layer so that the leather texture clips into the alphabets. You can do so by clicking the Clipping Mask icon at the bottom of the Layers panel.
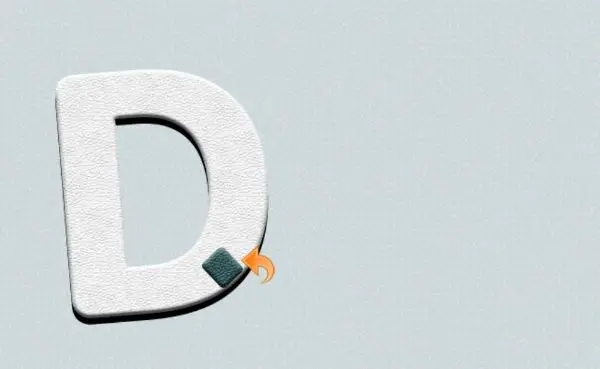
6. Add details:
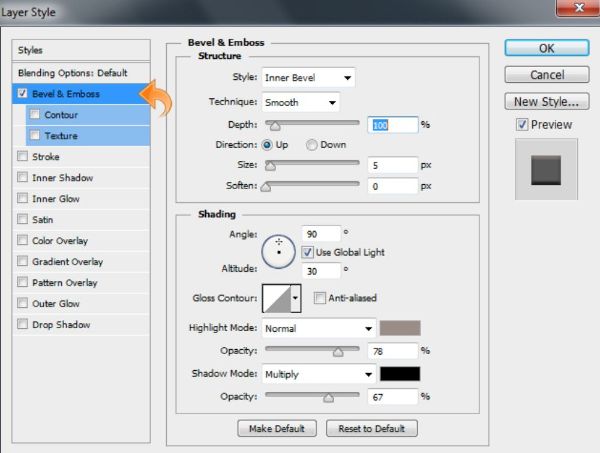
Now, we begin to get into the detailing of the design. To create the tiny rectangular details on the D, create a rounded rectangle using the rectangle tool. You can adjust the size as well as the direction of the shape using the Transform tool (Ctrl+T). Double click on the rectangle layer and select Bevel and Emboss. You can set the level of the options as in the following image.
7. Giving a 3D effect:
To fill in the rectangle with a complimentary color to the D, you can select a suitable resolution leather image and paste it in. Clip the image to the rectangle by creating a Clipping Mask. You can also play with some primary light and shadow effects in case you find the color flat.
8. Add some more details:
Duplicate the rectangle shape and change their curvature according to the form of the D. You can add Texture, Bevel, and Emboss as well as Drop Shadow using the setting mentioned above. This detailing will ensure a certain depth to the leather texture.
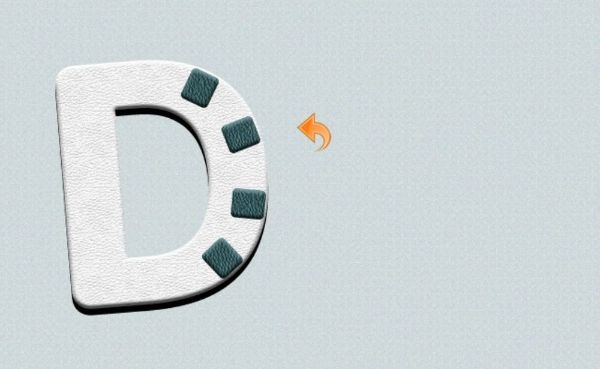
9. Add another ‘D’:
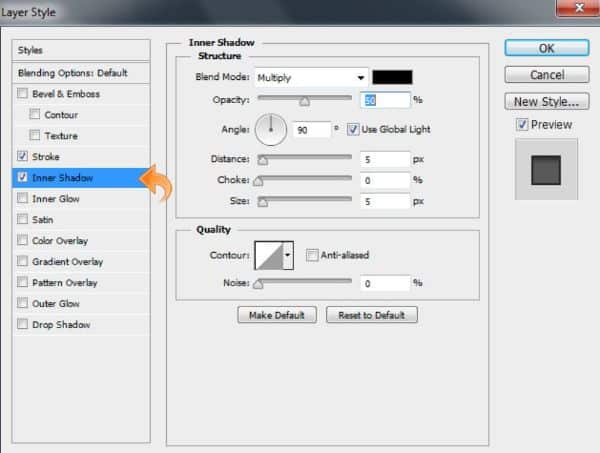
Following the previous step, we will not begin by giving a certain depth to the alphabet. Using the Text tool, create another D with the same font and color. This time, make sure that the size is slightly smaller than the original D. Place it on top of the original D. Now double click on the lower D layer and set the values of Strokes and Inner Shadow as mentioned below in the images.
10. Add more details to the ‘D’:
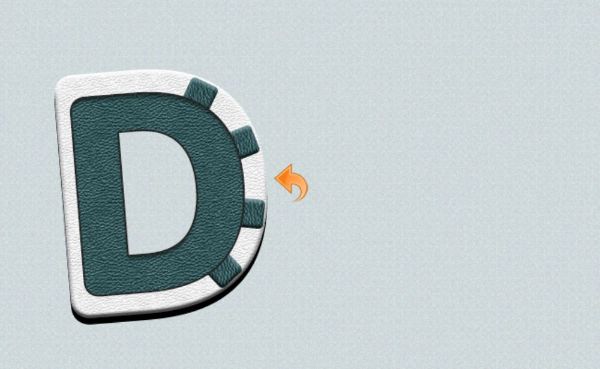
And now, we dress up the smaller D in the same color as the tiny rectangle details. Select the same leather texture effect and paste it on top of the smaller D. Create a clipping mask, and now, your design will have a certain depth that looks great!
11. Add more depth:
Going in further, using the Type tool, create another D, which is yet another size smaller than the second one. Place it inside the second D and double click to open the layer styles dialogue box. Set the levels for Bevel and Emboss, Stroke and Drop Shadow as following:
12. Add texture:
Now download a high-quality brown leather image and place it on the smaller D. Create a clipping mask and fix the leather texture within the lowest D. You can play with the brightness and contrast to give either a more realistic or a slightly comical look.
13. Add one more D:
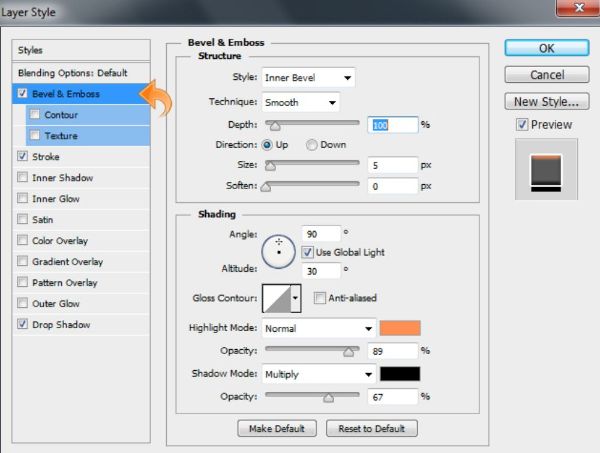
One last time, repeat the same action and create a letter that is even smaller in size using the Type Tool. Place it at the center of the D and change its layer styles as follows. Make sure you select all the options as in the image for Bevel and Emboss layer style.
14. Texture and effects:
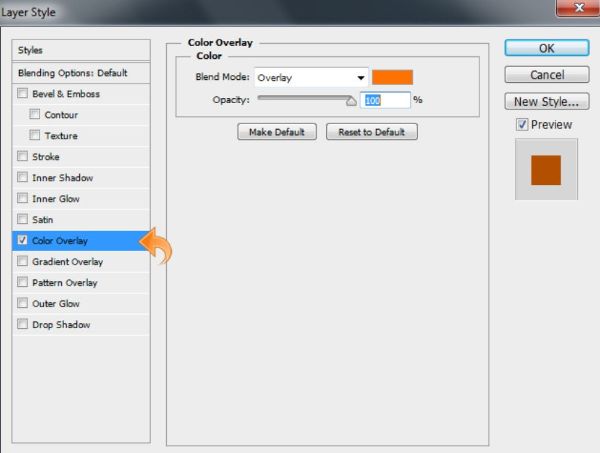
Now, using the same brown texture as earlier, set it on the alphabet. Create a clipping mask and stick it to the letter. However, in order to create a depth effect, we will have to change the color of this brown to a slightly lighter one. Double click on the leather texture layer. Select Color Overlay under the layer styles and select #ff7200 as the color. Set the blend mode to Overlay.
15. Create the stitches:
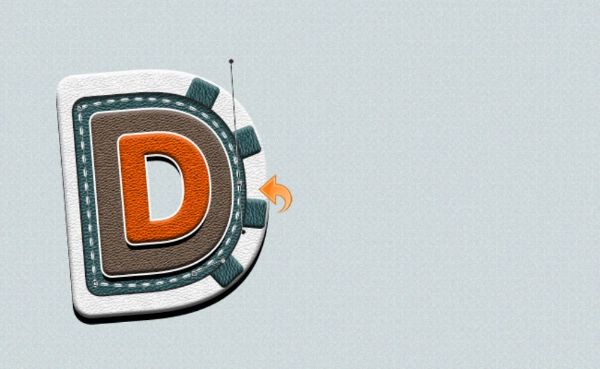
Moving on, we must now begin with the stitches on the leather. For this, first set the foreground color to a basic #f8f8f8. Following this step, you must select a round hard brush and adjust the brush’s size according to your artwork to make it look like stitches. Take care of the spacing between the strokes as well. Post this, create a new layer. Using the pen tool, mark a path on the text, then right-click over it and select “Stroke Path.”
You must make the stitches look like they were embedded into the leather. Hence, select the layer with the stitches and double-click on it to enter the Layer Styles. Add a Drop Shadow to this layer using the following values.
16. Create and repeat:

Repeat the previous step with all the D layers so that every part looks like it was attached with stitches. You can experiment with the colors and sizes of the stitches – to make it look more realistic. Do not go overboard with this step as it could also end up looking gimmicky. However, make sure you chose the colors according to your design so that it seems real.
17. Draw leather strings:

Now, we shall enter the third part of this particular artwork, which explains how to draw leather strings in Photoshop. In order to complete this part, create a new layer. Using a hard round brush, draw a vertical line in the color #4b4b4b. Then, go to Filter. Choose Gaussian Blur under Blur and set the value to 5.5 pixels. This will give a blurry depth feel to the string that will make it look rounded.
18. Draw the metal ring:

To draw the metal ring (string hole) in the alphabet, select a hard round brush, and use the color #363636 to create a simple dot. Make sure the size of the brush is appropriate to cover the ring size. Now using the Eraser tool, just rub off the center of the dot to make it look like a ring. Now, select this layer and double click to open the Layer Styles. Set the Bevel and Emboss, Strokes, and Drop Shadow as per mentioned in the images below.
Similarly, follow this same process to create more rings as per need using the color #9d9d9d. You can simply duplicate the layer styles and paste them over the new rings to give similar effects.
19. Add effects:

Now, create another new layer. Select the hard round brush in color #d8d8d8 and draw a vertical line. Select the Layer Styles to add Drop Shadow and Bevel and Emboss according to these following values:
20. Add noise:
Now add some noise to the layer using Filter>Noise>Add Noise. You can use the Burn and Dodge tools to darken or lighten the strings, respectively. With this, we finally finish the drawstrings as well.
21. Add blur and noise:
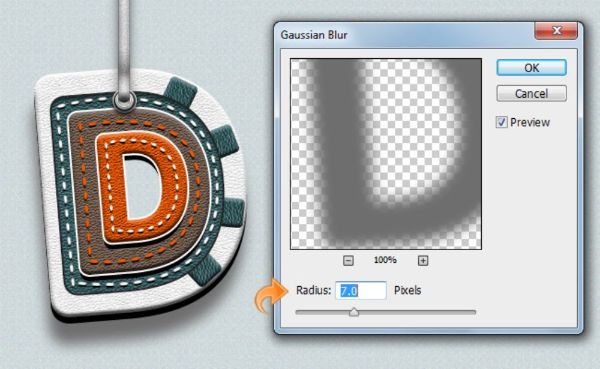
Moving towards the final touches of the artwork, we must not incorporate some shadows to the overall alphabet to make it stand out. For this, using the Text tool, create the same alphabet in color #949494. Now right click on the layer and click on the option – Rasterize Layer. Then click on this layer and apply Gaussian Blur from Filter>Blur>Gaussian Blur. Follow this step by adding some noise to the shadow from Filter>Noise>Add Noise.
22. Repeat and get done!
Now, replicate these steps with the other alphabets, and you are good to go!
CONCLUSION
All the steps mentioned above could change as per your design requirements. You can choose to skip a few steps and/or add other few as per your need. The most vital part that needs to be taken care of while designing a leather text effect is the fall of light and shadow on the artwork. The light is what defines where the texture will be visible, and where it won’t. Make sure you are thorough with your choices of values for Drop Shadow and Bevel and Emboss.
You can change the colors of leather by creating overlays, as explained in Step 13 and 14. Ensure that while doing this, the colors do not go off your palette – or even off the palette of leather. You can pick from a wide selection of cool and warm colors but stick to earthy tones to give maximum effect to your artwork.
The leather text effect is a beneficial method when it comes to designing graphics. If mastered well, you can create proper 3D objects using this technique to fill up the need for missing pieces in your frame. Leather text effect can also be used on websites such as hardware, leather products, some luxury accessories, or many other options. It is a beautiful and unique way of following the trends and keeping up your typography game. Leather text effect can also be used on billboards and hoardings, in brochures, or even on branding collaterals – if your brand has a secure connection to leather.
The simple key to nailing any pattern on text is to take care of the light and shadow needs. And in case all of these things fall in place, you can easily create textures on text using this very technique.