Line25

How To Create Flat Style Breadcrumb Links with CSS

How To Create Flat Style Breadcrumb Links with CSS
Home » Tutorials » How To Create Flat Style Breadcrumb Links with CSS

Line25 is reader supported. At no cost to you a commission from sponsors may be earned when a purchase is made via links on the site. Learn more

With all the progressions of CSS and CSS3 over recent years we’ve reached a point where many of the old coding techniques that involved background images can now be created entirely with CSS. In this tutorial we’ll look at creating a series of breadcrumb navigation links in a flat design style without the need for the previously popular “sliding doors background image” method.

CSS breadcrumb linksPinPin

The breadcrumb links we’ll be creating are styled with chevron shapes to support the idea of drilled down content. Previously a background PNG image would be used to create this chevron shape, but with the help of clever border techniques the same effect can be created purely with CSS.

View the CSS breadcrumb links demo

<div id="crumbs">
	<ul>
		<li><a href="#">Breadcrumb</a></li>
	</ul>
</div>

We’ll begin by quickly fleshing out the breadcrumb navigation links as an unordered list. Each breadcrumb link will appear as an <li> with a nested anchor element.

Pin

#crumbs ul li a {
	display: block;
	float: left;
	height: 50px;
	background: #3498db;
	text-align: center;
	padding: 30px 40px 0 40px;
	position: relative;
	margin: 0 10px 0 0; 
	
	font-size: 20px;
	text-decoration: none;
	color: #fff;
}

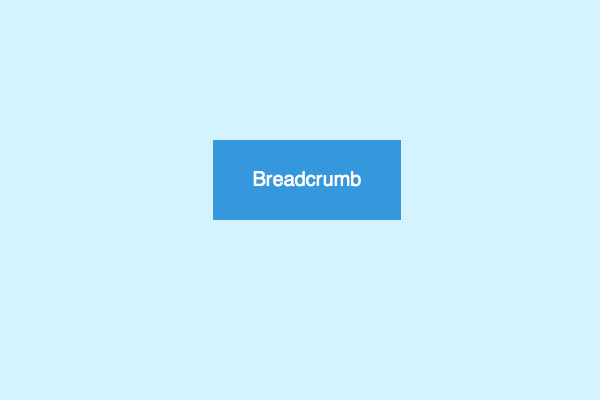
The initial CSS code styles up each list item anchor as a neat blue rectangle. The text is positioned centrally within the space and equal padding is added to either side. In order to position elements absolutely later, position: relative; is added so those absolutely positioned objects will display relative to this parent element.

Pin

#crumbs ul li a:after {
	content: "";  
	border-top: 40px solid red;
	border-bottom: 40px solid red;
	border-left: 40px solid blue;
	position: absolute; right: -40px; top: 0;
}

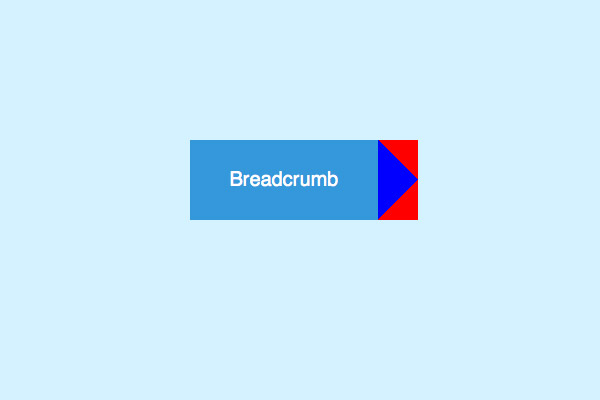
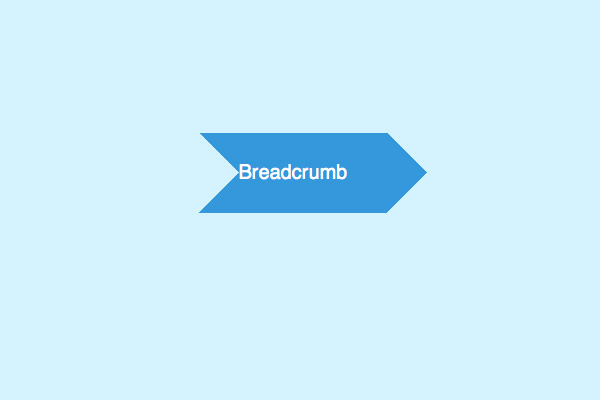
We’ll now recreate the chevron effect in CSS that would previously only be achievable with a background image. Use the :after selector to create an extra element that can be styled up individually. The triangle shape is generated through the use of various CSS borders, so as you can see in the initial demo a single blue triangle can be created by applying top and bottom borders to intersect the overlap. These are currently coloured red for demonstration, but making these transparent will produce a single blue triangle. This border effect is then moved into place through absolute positioning.

Pin

border-top: 40px solid transparent;
border-bottom: 40px solid transparent;
border-left: 40px solid #3498db;

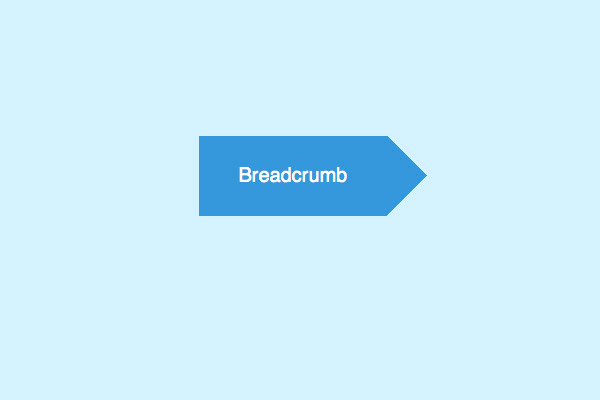
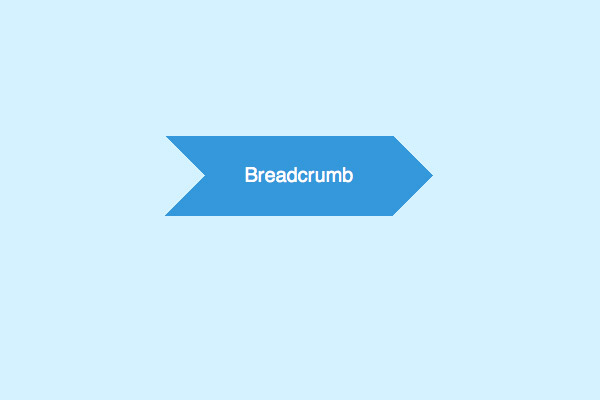
The border effect with the correct colour values will produce the desired triangle which gives the breadcrumb link the popular chevron shape.

Pin

#crumbs ul li a:before {
	content: "";  
	border-top: 40px solid transparent;
	border-bottom: 40px solid transparent;
	border-left: 40px solid #d4f2ff;
	position: absolute; left: 0; top: 0;
}

Using the same principle another triangle shape can be applied to the left of the breadcrumb link. This time the border colour is set the same as the page background to disguise parts of the blue link background colour.

Pin

padding: 30px 40px 0 80px;

This additional triangle before the link affects the appearance of the text, but a simple padding adjustment will quickly rectify its appearance.

Pin

<div id="crumbs">
	<ul>
		<li><a href="#1">One</a></li>
		<li><a href="#2">Two</a></li>
		<li><a href="#3">Three</a></li>
		<li><a href="#4">Four</a></li>
		<li><a href="#5">Five</a></li>
	</ul>
</div>

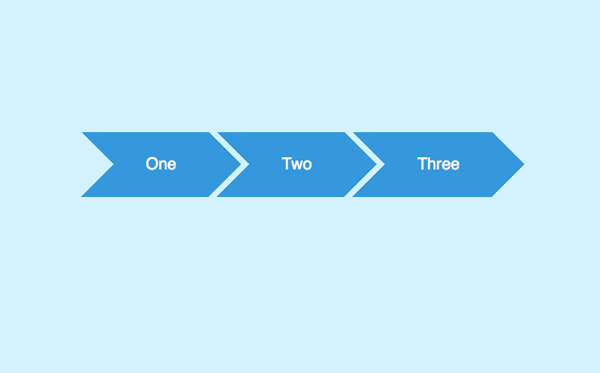
As more links are added to the HTML the series of breadcrumbs increases, each separated by the cool chevron shape thanks to the CSS border triangle effect and a touch of right margin.

Pin

#crumbs ul li:first-child a {
	border-top-left-radius: 10px; border-bottom-left-radius: 10px;
}
#crumbs ul li:first-child a:before {
	display: none; 
}

#crumbs ul li:last-child a {
	padding-right: 80px;
	border-top-right-radius: 10px; border-bottom-right-radius: 10px;
}
#crumbs ul li:last-child a:after {
	display: none; 
}

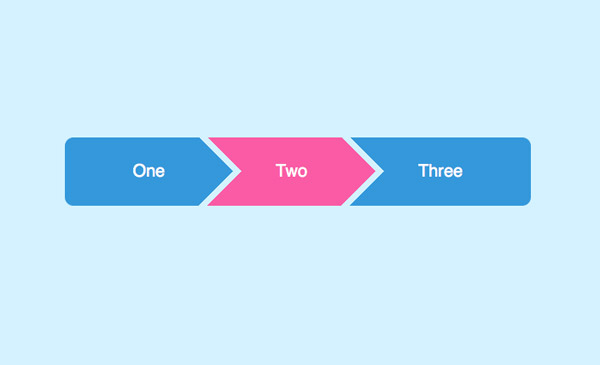
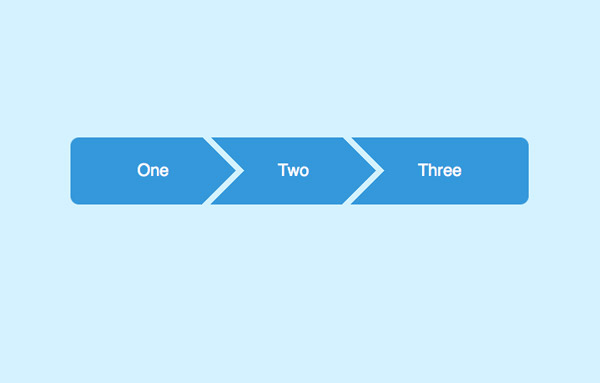
The full breadcrumb navigation list can be further styled by removing the triangle effect on the first and last items with the help of the :first-child and :last-child selectors, then given subtle rounded corners with border-radius.

CSS breadcrumb linksPinPin

#crumbs ul li a:hover {
	background: #fa5ba5;
}
	#crumbs ul li a:hover:after {
		border-left-color: #fa5ba5;
	}

All that’s left is to apply a hover effect to the links. Don’t forget to change the border-left-color on the hover state of the triangle effect so the whole breadcrumb link changes colour.

View the CSS breadcrumb links demo

Written by Iggy

Iggy is a designer who loves experimenting with new web design techniques, collating creative website designs, and writing about the latest design trends, inspiration, design freebies, and more. You can follow him on Twitter

45 Comments

Would you like to say something?

  1. jang says:

    Height is 50px, why is the border value 40px?

  2. Maniruzzaman Akash says:

    Finally got the clear explanation of every line of code and why and how it’s working.. Thanks Admin..

  3. Donahue says:

    Thank you,I have been using this technique for a while now, on several websites

  4. Dave says:

    Thanks for the great tutorial line25. This post is very useful to create Flat Style Breadcrumb links with Css.

  5. Samuel says:

    How can i add a Active Nav class on only one link?

  6. Krizlay says:

    Looks very cool design for breadcrumbs. I will try this one to blogspot.

  7. Kartik Goyal says:

    Very usefull post for website designers.

  8. Dan says:

    Hello,
    I need to create a border for the chevron.
    How would this be possible?
    Haven’t been able to achieve this.
    Hope someone could help me.

    Here is the code:
    codepen.io/adida948/pen/xRBzOP

  9. Will says:

    When using this approach, the inclusion of the ‘disabled’ class appears to stack and I’m having difficulty establishing why.

    Any thoughts? The example CSS is “as is”.

    Example of the issue at imgur.com/2Jdc81A

    The first 3 nodes are active, the last two are disabled.

  10. Mathiya says:

    The crumbs css is working properly in chrome but getting striked off in ie11

  11. Icecube Digital says:

    Very informative post!!

    Nowadays, people would like to have flat style breadcrumb on their websites in order to attract website visitors.

    And this step by step guide will definitely help to non techie people in an effective manner

    Thanks.

  12. Jennifer Stevenson says:

    Great one, just implemented it.

    Thanks!

  13. Mike says:

    I like this a lot…thanks for taking the time to write this up! Looks great.

  14. Phil says:

    Thanks for the code! Here it is responsive…

    codepen.io/anon/pen/BKaWPV

  15. HireWPGeeks says:

    Thanks for the great tutorial. All the instructions are well written. This post could be probably benefits for all of us.

  16. Mick says:

    Great one, just implemented it. Thanks for that!

  17. Watte says:

    Thanks mate!

  18. Kim says:

    Thanks for the tutorial, can’t wait to try it out.

  19. Izmir says:

    Thanks for the tips I would like to know how to reduce the size of all the objects and getting the text middle of each rectangle.

  20. reza says:

    Excellent tutorial. Much appreciated.

  21. Jerralyn Tanoc says:

    Another great tutorial Chris, breadcrumb flat style is really awesome. Thanks a lot for sharing this, it’s simple and easy to follow.

  22. Fernando says:

    Amazing tuto, as always. Thank you very much, Chris!

  23. tomasz stryjewski says:

    um… any reason why my comment got removed?

  24. tomasz stryjewski says:

    i had my take on this concept:
    https://codepen.io/stryju/pen/kHrAE

    differences:
    – transparent “border” between the blocks
    – inline-block blocks, not floating, so can be centered
    – animated transition

    let me know what you think.
    cheers

  25. Fisnik says:

    You sir deserve a medal ! Thanks

  26. Jonas says:

    Great tutorial! I have been using this technique for a while now, on several websites, so I created a kind of automated generator for it to make it raiser to change sizes and colors (on Codepen):

    https://codepen.io/pocketjoso/pen/foLAd

  27. Leanne says:

    Thanks Donto, that worked perfectly!

  28. battlefield 4 beta keys says:

    Hello, this weekend is pleasant in support of me, for the reason
    that this point in time i am reading this enormous educational piece of
    writing here at my house.

  29. Donto says:

    To solve the missing point with the :after problem, add

    “z-index: 1;”

    at the end of

    #crumbs ul li a:after {

    }

  30. Leanne says:

    I am having a problem where the :after element tips are hidden behind the :before elements. It is almost like the layering order needs to be reversed somehow.

    Can anyone help, it sounds like the same problem HenriD is having?

  31. Amit says:

    Superb tutorial.. Its help me!

    Thanx!!
    :)

  32. Jelle P says:

    I’ve got the same problem as Henri D. Everything looks good, but the tabs are not aligned to each other…

  33. Henri D says:

    tried this but the navigation tabs are not aligning to the top of the page and instead cascades down like a row of steps?

  34. Derek Nutile says:

    The next step would be handling the crumbs responsively…

  35. Jon Ewing says:

    Looks great and your step-by-step instructions are excellent.

    In the past, coming from the old school, I’ve done menus like this, but with image maps. Haven’t attempted it lately and obviously if I do I’ll be returning to this tutorial to “borrow” your code ;-)

  36. karachi web design says:

    Its really awesome for upcoming peoples and great efforts.

  37. Timoveld says:

    I tried something similar to this once, but couldn’t figure out how to compensate for the offset difference in Firefox and Chrome.

    Your demo appears to have the same issue.

    When viewing the demo in firefox, the triangles are offset by 1 pixel.

    • Timoveld says:

      How embarrassing, my browser wasn’t zoomed at 100% but was 1 click off, that created the offset in firefox.
      Your demo appears to be working fine now.

Please Share