Line25 is reader supported. At no cost to you a commission from sponsors may be earned when a purchase is made via links on the site. Learn more
Learn how to install a jQuery lightbox, by following this easy, step by step tutorial. Check it out and start learning!
Have you always wanted to add those cool Javascript lightbox galleries to your website, but haven’t the first clue about how to do so? This guide is aimed at the Javascript coding noob and will take you through the step by step process of linking up the jQuery library, installing the lightbox script and getting everything working.
View the jQuery lightbox gallery demo
We all start from the basics when learning the various coding languages in our web design careers. There’s all kinds of intermediate and advanced tutorials describing how to create awesome stuff with Javascript, but sometimes the very basics are hard to find. Installing a lightbox gallery script is probably one of the most common tasks a Javascript noob is likely to attempt on their website, and is probably most people’s introduction to the world of Javascript libraries and plugins. This little tutorial is for those people who want to add the functionality of a lightbox, but haven’t the first clue about how to do so.
jQuery is my Javascript library of choice so this will be the base of today’s tutorial. The jQuery syntax is quite similar to CSS and is pretty straight forward, making it easy for beginners to learn. What’s more, due to its popularity there’s stacks of cool, ready-made plugin scripts that you can use to easily add to your website and impress your friends.

There’s stacks of jQuery lightbox scripts available on the web. Some support just images, some support video and inline HTML. All we need today is basic image support, so I’m using the trusty jQuery lightbox script from leandrovieira.com.
Before we start – The basic HTML and CSS
Before adding any kind of Javascript to your site, you should build the structural HTML and have everything styled up with CSS. Javascript is used to enhance your website, but it should also work perfectly well without it albeit without as much glamour.
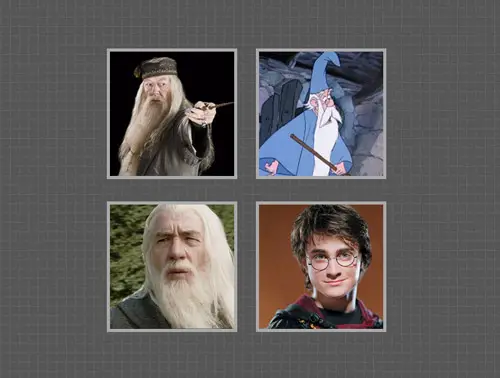
<div id="wizards">

	<ul>
		<li><a href="images/dumbledore.jpg"><img src="images/dumbledore-sm.jpg" alt="Dumbledore" /></a></li>
		<li><a href="images/merlin.jpg"><img src="images/merlin-sm.jpg" alt="Merlin" /></a></li>
		<li><a href="images/gandalf.jpg"><img src="images/gandalf-sm.jpg" alt="Gandalf" /></a></li>
		<li><a href="images/harry-potter.jpg"><img src="images/harry-potter-sm.jpg" alt="Harry Potter" /></a></li>
	</ul>

</div>
An Unordered List is the perfect element to use for any kind of image gallery. Inside each <li> item the images are linked up with basic anchors. I’ve already exported large and thumbnail sized versions of each image, so the anchor links to the large version, then an image tag is used to display the thumbnail version.
This guide is aimed at the designer who is confident with their HTML and CSS ability and is looking to polish their skills with a spot of basic jQuery. If you’re stuck at this stage I’d suggest going back and concentrating on the basics of HTML and CSS before tackling anything Javascript related.
body, ul, li, img {
	margin: 0; padding: 0; border: 0;
}

body {
	background: #545454 url(images/bg.png);
}

#wizards {
	width: 500px; margin: 200px auto;
}

#wizards li {
	list-style: none; float: left; margin: 15px;
}

	#wizards a img {
		border: 5px solid #aaa;
	}
		#wizards a:hover img {
			border: 5px solid #75879d;
		}
The CSS for my demo gallery is pretty simple. I just have a background image repeating across the page body, then the gallery is enclosed within the #wizards div and centred up on the page. Each list item has its default bullet point removed with list-style:none;, is floated left an spaced out with a spot of margin. The image inside every anchor is given a 5px border, which changes colour on hover to provide a visual clue that the image is clickable.
If you test your page at this stage everything should work perfectly fine, although the larger images will simply open in a blank page. Which is ugly and boring. Let’s get to the fun jQuery part!
Installing the jQuery files

jQuery is a Javascript library which takes the difficultly out of writing Javascript. To use it we have to link up a jQuery file from the HTML. Download the library from jQuery.com and place it in a folder named ‘js’ in your local file directory. If the code appears in your browser window when downloading the file, simply copy it and paste it into a blank document in your code editing app of choice. Save the file as jquery.js.
<script type="text/javascript" src="js/jquery.js"></script>
In your HTML document reference the file using the script tag, this could be before the closing </head> tag, or the closing </body> tag at the bottom of the page. Make sure you have the path to the jQuery file written correctly. Now jQuery has been added to your web page you can add as many ready-made plugins or write as much custom jQuery to spice up your site as you wish.
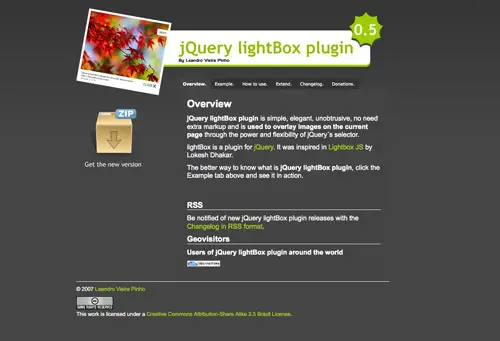
Next we need to download the handy lightbox script file from leandrovieira.com. The zip comes packed with various files, but we don’t need them all. Copy the jquery.lightbox-0.5.min.js file from the js folder into your own js folder. I tend to trim down the name to jquery-lightbox.js for ease. Next, copy all the images from the images folder. I tend to paste these into the js folder rather than my images folder as they’re Javascript specific. Finally you’ll need the jquery.lightbox-0.5.css file – You can either reference this as a separate CSS file from your HTML, or paste all the contents at the bottom of your current CSS file (which is style.css in my case).
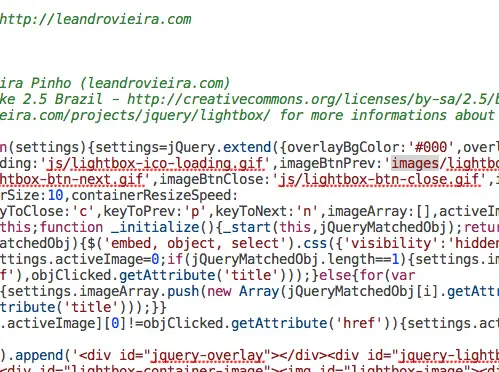
If you moved the images from the lightbox package into a different folder, you may need to change the paths inside the lightbox Javascript file. Open it up in a code editor and change the urls in the first couple of lines.
Activating the plugin
<script type="text/javascript" src="js/jquery.js"></script>
<script type="text/javascript" src="js/jquery-lightbox.js"></script>
<script type="text/javascript" src="js/scripts.js"></script>
The plugin files are now installed and ready to use but they won’t do anything unless they’re told. We now need to write a line or two of our own jQuery to get things working. It’s useful to keep your own Javascript separate from plugin files, so create a new document called sripts.js and reference it underneath the jQuery library and the plugin file in your HTML document.
$(document).ready(function() {

});
Every jQuery command must be surrounded by a line of code that says ‘when the document is ready, do this’. Inside the scripts.js file add the above code.
$(document).ready(function() {
	$("#wizards a").lightBox();
});
Now to get the lightbox working you need to target a particular element, but there’s a range of different methods to do so. The easiest in this case would be to target the anchor inside the #wizards div.
If you have other galleries on the same page, they wouldn’t be targeted by the lightbox script because they would have different names (at least they should be as IDs can only be used once!). Alternatively you could add a class to each gallery list and target them all like so $(".gallery a").lightBox();.
$(document).ready(function() {
	$("a[href$=.jpg]").lightBox();
	$("a[href$=.gif]").lightBox();
	$("a[href$=.png]").lightBox();
});
One trick I employ on my sites is to use attribute selectors to target every link to a JPG, PNG or GIF file on the page. Every linked image will then display in a popup lightbox gallery automatically.
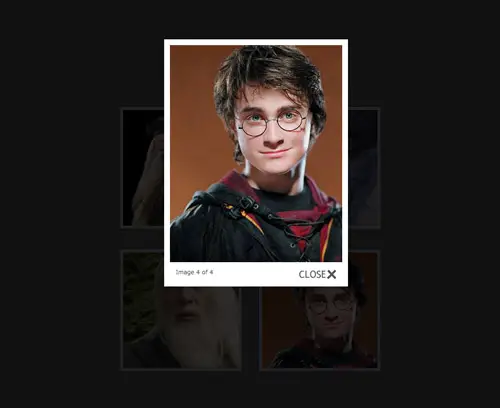
The finished working lightbox gallery
Your jQuery powered gallery should now be working perfectly. Check out my little demo to see it in action.
Comments are closed.