Line25 is reader supported. At no cost to you a commission from sponsors may be earned when a purchase is made via links on the site. Learn more
Before discussing creating Instagram filters in Photoshop, lets have a look at where we started from.While the world is progressing with technology and digital equipment, it is safe to say that photography is taking a step back into the retro era. Digital cameras with excessive features are a want, but hipster-analogue photography has almost become a need among young and budding photographers.
Earlier, only nerdy photography students would explore the world of vintage cameras like Holga, Diana, Minolta and Nikon. But now, every urban teenager has a knack for this old grandpa equipment – and the real question is why is that? These classic film cameras provide a wholesome experience to a photographer – right from deciding the light, to clicking and developing the pictures. And the best part is the effect that the film provides – the unique, grainy and sometimes faded effect, that no other camera could give. This is one of the biggest reasons why Hipster-Analog photography is a big thing now; as they say: Old is Gold, and everybody is trying to go back to gold!
The best, however, is that social media platforms walk in with in-built features like filters and effects that can immediately transform your pictures. You can choose from a wide array of filters to edit your images within the app as well. Photoshop can also be a great host for creating new filters of your own and editing your images without the use of a phone app. Instagram provides some stunning Instagram filters such as Amaro, Nashville, Juno and a lot more. However, these are preset which you cannot use through your computer for any other purposes. It is straightforward to replicate these filters in Photoshop and as you can see, creating your own filter and having others use it is always fun! You can go crazy and also add as many effects as you wish to, and it shall still be a hit.
In this article, we shall glance at one of the methods using which you can create your own Instagram filters using Photoshop. To give a unique look, all you have to do is try changing the different values of the effects and try a tad bit of mix-and-match. You can use all the effects together, or separately based on the look you are trying to achieve.
1. Pick an Image:

It is essential to understand that the purpose of filters is to help the image depict a specific mood. Hence, while selecting an image, you must make sure that it is not stagnant in terms of colors and subjects. Try to understand the kind of vibe the image already has followed by the vibe you want to depict. Understanding this step is the most vital part when it comes to creating your own filters.
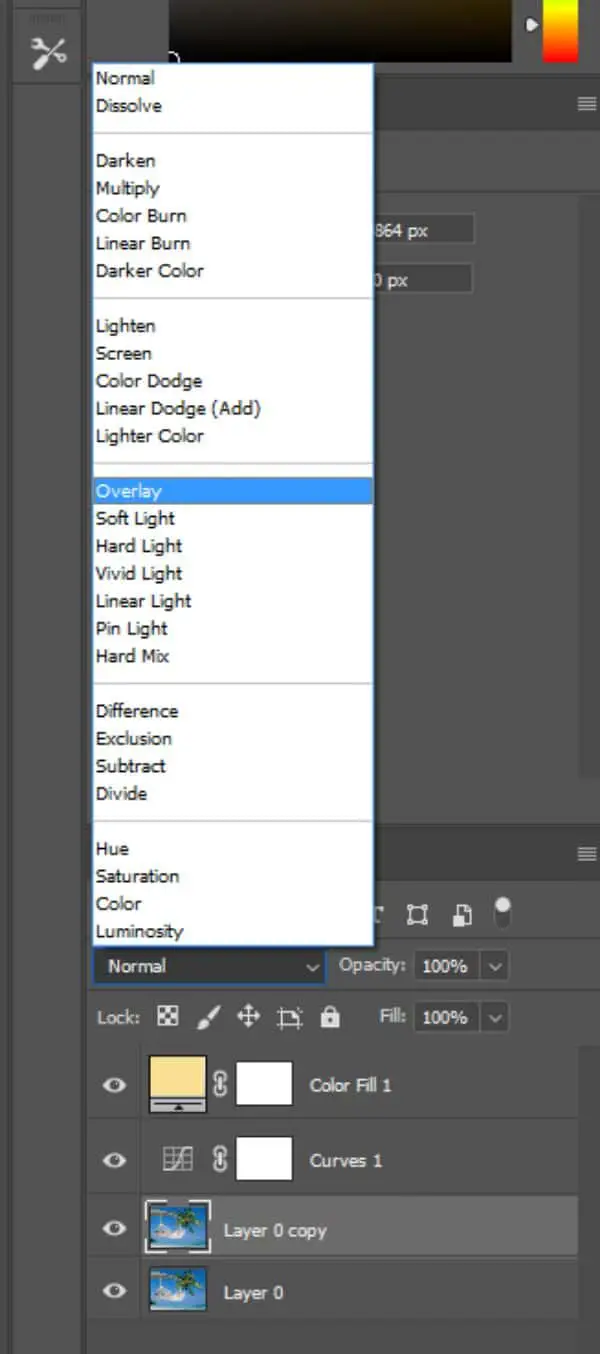
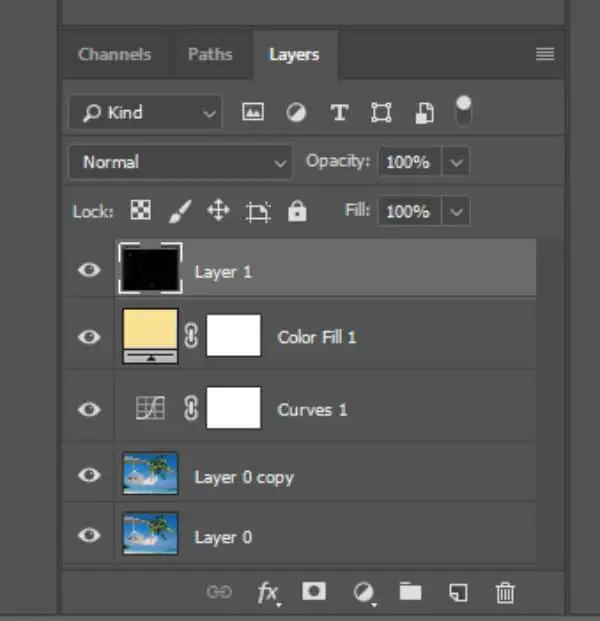
2. Add a Fill Layer of Solid Color:
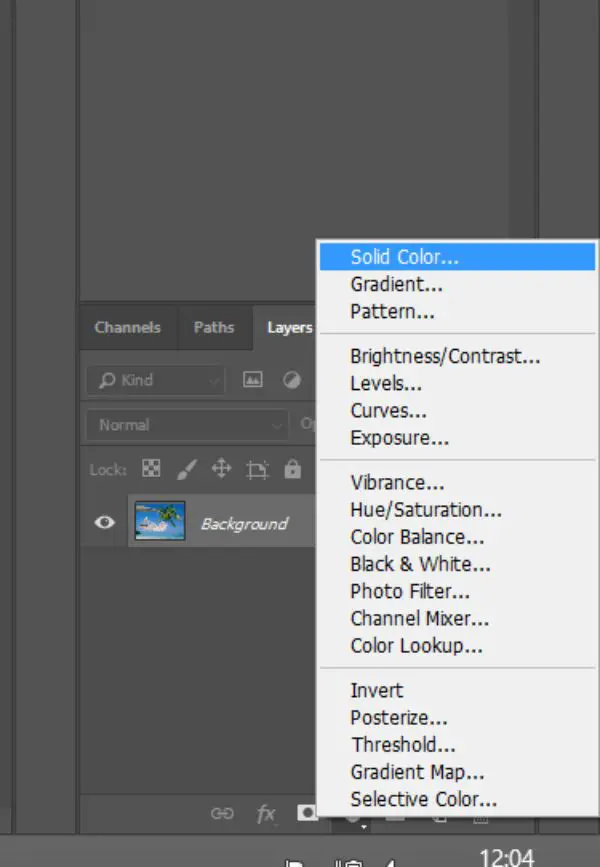
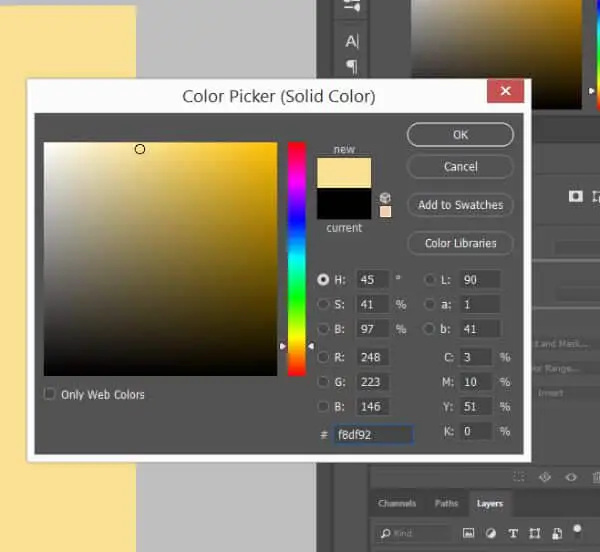


This is the step that defines the underlying mood of your image. Choosing an overlay solid color gives a very defined vibe to the entire image. So make sure you select this color wisely.
Create a new adjustment layer by clicking on the small black and white circle in your Layers Panel, and select Solid Color. Now pick the shade that is closest to the vibe you wish to acquire – we have chosen a pale orange shade. Once you have selected the color, a blank canvas of the selected color shall appear. Now change the Layer Blend Mode in your layers panel from Normal to Multiply. You can now see that the image has a tinge of the solid color chosen.
3. Curve Adjustment:
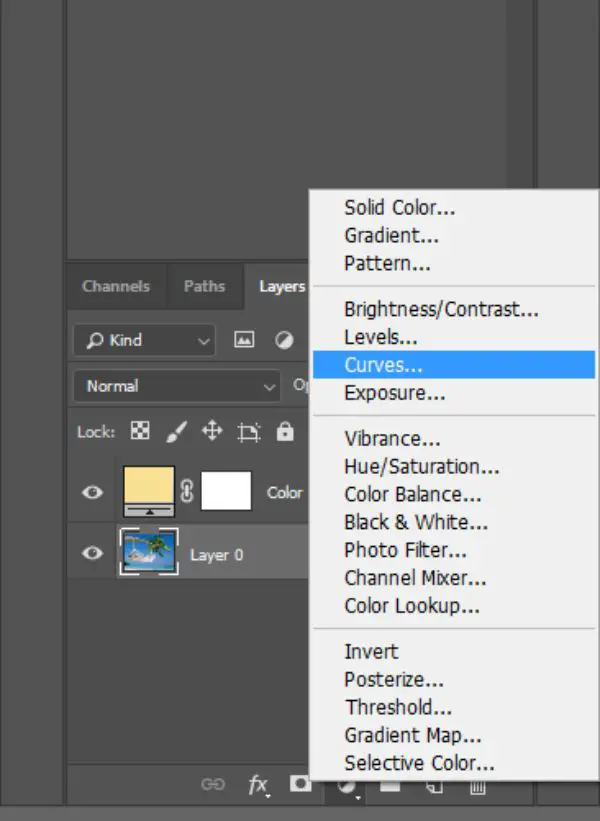

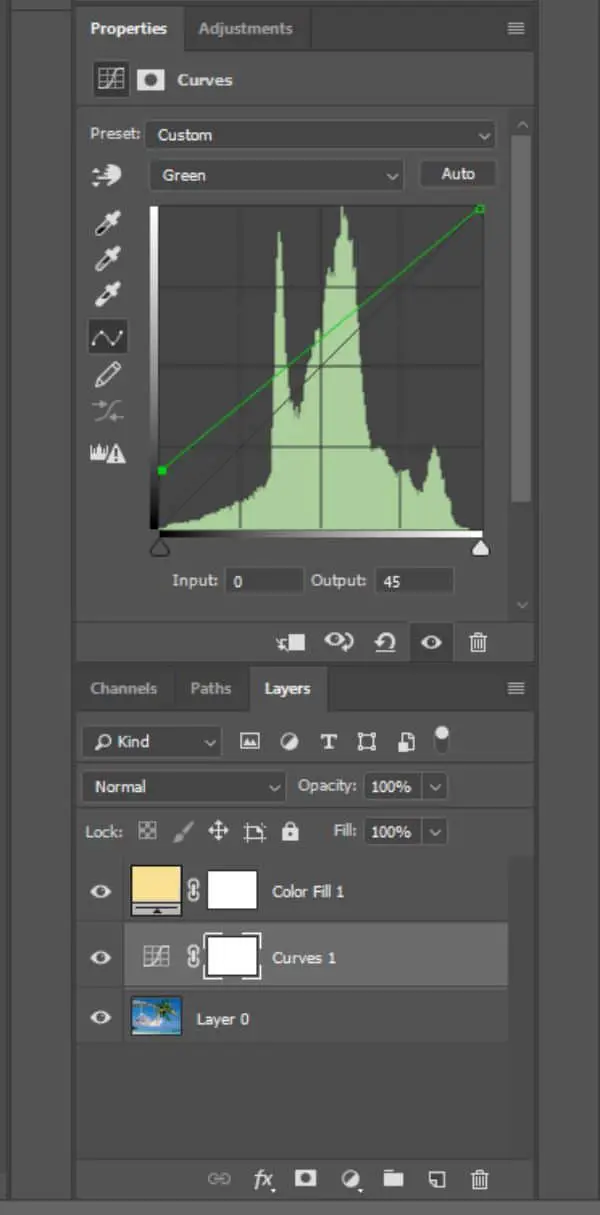
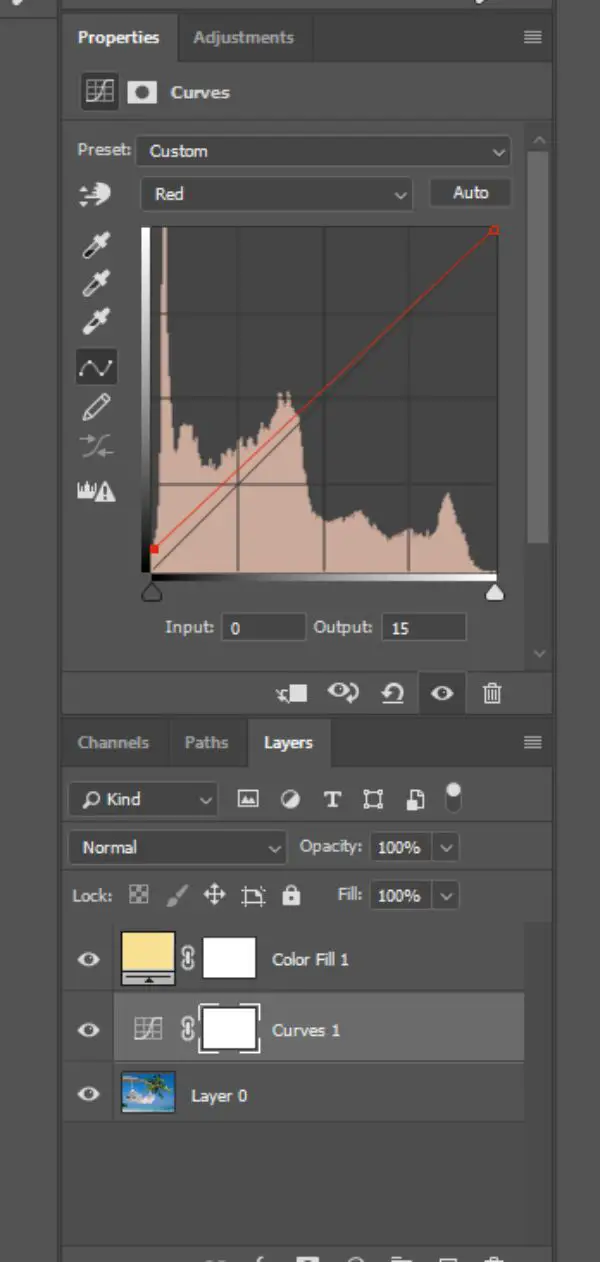

This step for creating Instagram filters defines the color intensity of each of the three – Red, Green and Blue. Adjusting these curves also ensures a slightly faded, which can also elevate the look of the image sometimes.
To check the RGB curves, select the layer with the image and click on the curves option at the bottom of layer panels. You can also simply do this by clicking Ctrl+M or Image>Adjustments and then Curves. Once you open the curves panel, select the Blue channel and drag the tiny blue square to a point where the output value is 150. Now select the Green channel and set the value to an Output of 45. Repeat the step for the Red channel as well and set it to an output of 15.
This ensures that your image has a relaxed look, along with a tinge of red warmth. However, these values can change when it comes to portraits and images with different lighting. Make sure you select values which make sense according to the mood of the image.
4. Vibrancy:

This step for creating Instagram filter adds that little extra vibrancy to the image that makes all the difference. To be honest, you can also skip this step as it is just a minute change. However, the details make the most significant change, so this step can prove to be very helpful.
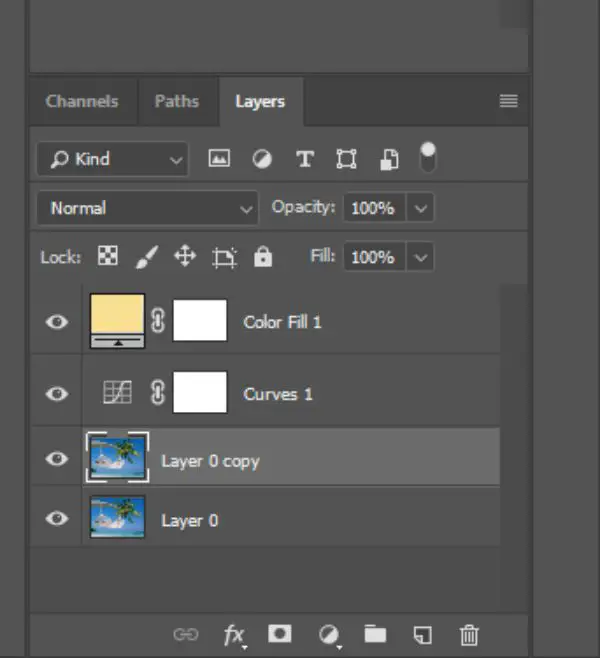
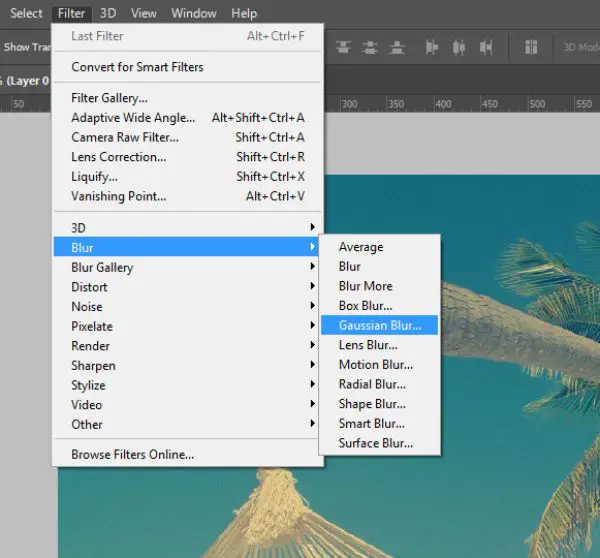
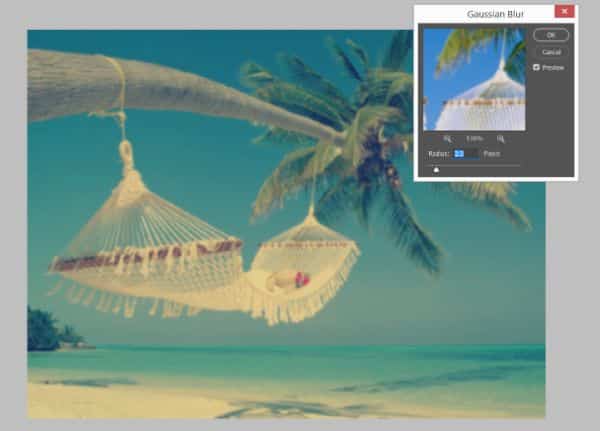
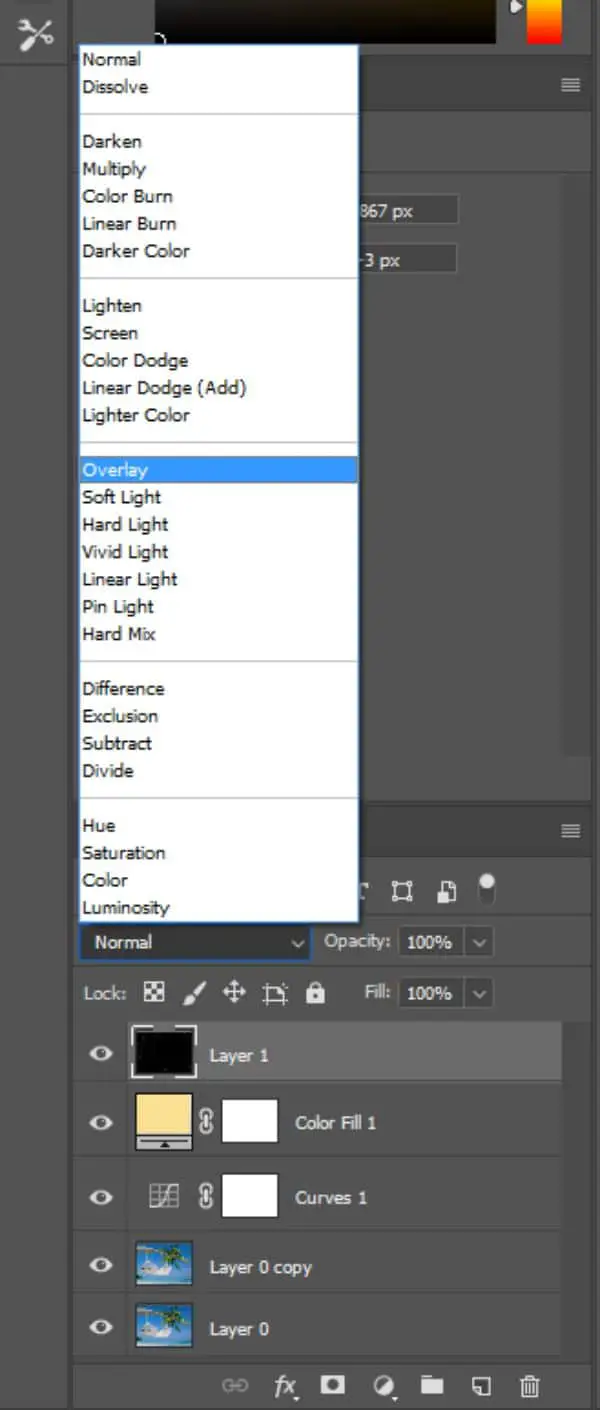
Create a duplicate layer of the image using Ctrl+M. Select the Gaussian Blur filter from the Filter section on the top menu under Blur. Substantially, this blurs out your entire frame, but adjust the values so that the radius is not more than 2-3px depending on the amount of vibrancy you expect in the image.
Now, you can click on the duplicate image layer and switch the layer blend mode from Normal to Overlay. Turn down the opacity from 100% to 50% depending on the amount of vibrancy you expect in the image. This shall also avoid the blur from your image.
5. Grain:
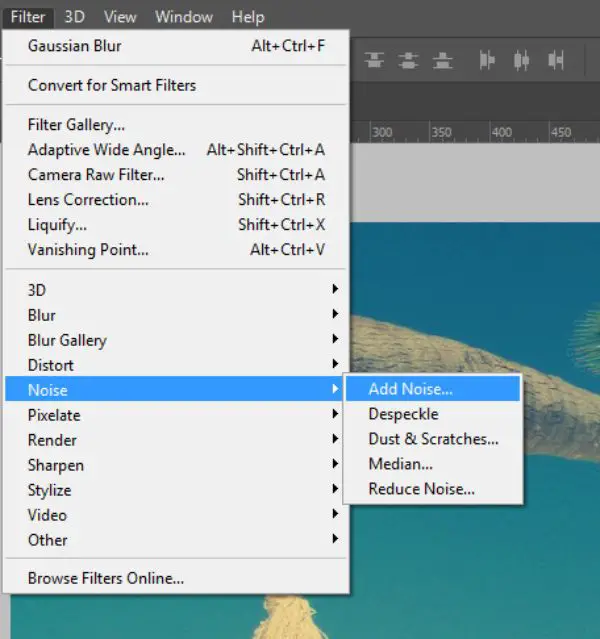
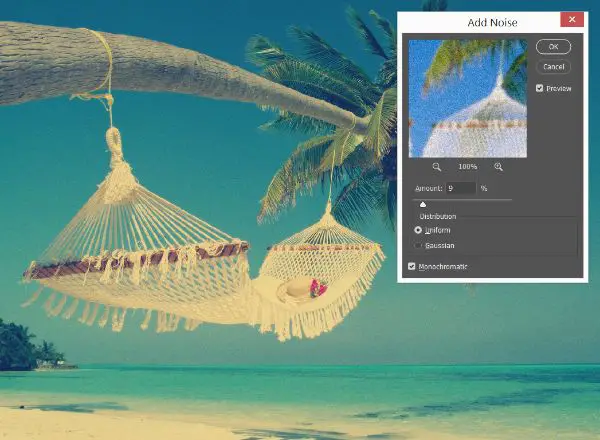

Adding noise or grain to the image always makes it look more vintage. And the best part is that you experiment with it as much as you’d like – and the image is definitely going to turn out artsy! You can also try experimenting with the size of the grain, as it gives a very different feel altogether.
To induce a particular noise, you can go to the filter and select Add Noise. Select the value according to your choice and add the needed grain to your image. This is an optional step – it not only adds a retro feel to the frame but also merges all the layers within the image and gives it a more wholesome look. What’s more, grain also helps to induce a certain amount of clarity to the whole image, which also helps the picture look more focused.
6. Film Effects:
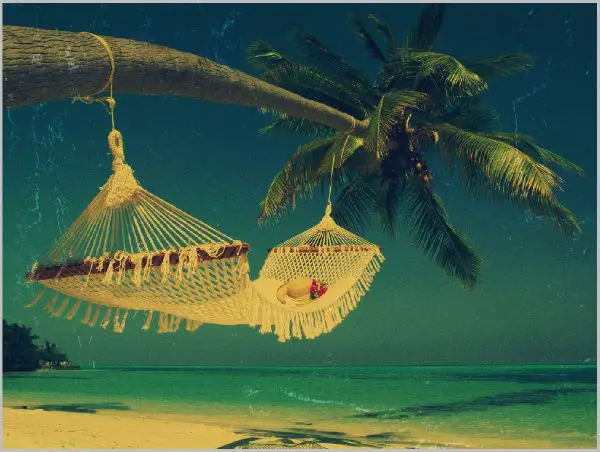
Film effects are the go-to these days! The tiny little specks of dust and grain that used to surface the old reel films are exactly what we are talking about. Even though we are trying to induce an effect on an image and not video, there are many ways of adding a speck effect. Many stock images are available online that you might be able to use over the top of your current image.
Select a template film effect image and place it on the top of all the layers. Change the layer blend mode from normal to overlay, and you shall see that the image contrast suddenly gets high. To balance that out and retrieve details in the original image, reduce the opacity of this layer to 50%.
What you shall see is a beautiful overlay of film grain. This effect is the most useful when you want some sort of typography or graphic on top of the image. It fades out the frame a little bit, which indeed give more scope for a graphical entity on top. The first thing that comes to mind is a postcard effect!
7. Drama:


The easiest and most efficient way to add drama to the filter is by altering the brightness and contrast of the image. However, it depends on you how you perceive the word ‘drama’. For some, it might mean increasing the temperature; for others, it might mean increasing the contrast. The most vital part of this process, is to identify the right kind of drama that suits your image just right. Following are some examples of edits that have been created using just temperature and brightness/contrast levels.
Make sure that you save these created effects as templates and use them regularly on your other images as well. All you have to do is tweak in the values of the colors and other aspects. You would notice the wondrous changes that take place!
How do Filters Help A Brand?
The best part about having your filter is that it is ‘Yours’! You can incorporate any and every kind of effect within it. This is authentic to your brand’s aesthetic as well as requirement. This, in return, creates a much-wanted brand awareness that can help you promote your aesthetic on social media platforms. It helps you show off your brand’s personality in a unique manner.
Another essential requirement that an Instagram filter can fulfill is that of connecting with your audience. Facts show that in 2019, more than 500 million accounts engaged in uploading stories on Instagram daily. It is always a bonus if you use one of the interactive elements provided by the app so that your stories become more discoverable. You can easily reach out to masses using these features – and so can your brand.
It is also fine to say that having your own Instagram filters ensures that you are ahead of the curve. The more number of people try out your filters and use them, the more your reachable your account is. As easy as the statement itself is, when users share their pictures using your filter, their followers are exposed to your brand as well. It is a huge opportunity to reach out to a broader audience without even spending any extra money over it.
Conclusion:
When it concerns Instagram, a lot of other filters are already available. However, they are only bound to get saturated once everyone begins using them. These 7 simple steps mentioned above can ensure positively that each of your frames shall end up looking different, even if you follow the same process. Essentially, this is possible if you keep in mind that the first step – where you select a solid base color – is appropriately executed.
Photographers and bloggers love to use different kind of filters and launch their filters on Instagram too. Apart from photo filters, Instagram also allows hosting your own AR (Augmented Reality) filters. More or less, these AR filters are 3D illustrations which stick to your face. Luckily, anybody can create their own AR filters using Spark AR Studio, which is a secure software to create and upload such fun filters.
We believe that it is safe to say – Effects and Filters are the new Photoshop! There are many options in applications and technology available in the market, and yet everybody is dependent on these quick-fix filters. It is a great way to shine and stand out above the rest. All you have to do is follow the steps, create an outstanding filter, upload it and you’re good to go!