Line25 is reader supported. At no cost to you a commission from sponsors may be earned when a purchase is made via links on the site. Learn more
I think you’ll agree with me when I say: creating a WordPress site is a challenging feat for a beginner. Where to start; what to do? Should you choose WordPress.com or WordPress.org, and what’s the difference between the two?
How much does creating a WordPress site cost? Is it $50 bucks, $100 bucks or $10,000 bucks? You have no idea. But still, you yearn to create a WordPress site and that’s good.
Take a breather. Turns out creating a WordPress website is easy, and in this post I will show you exactly how. At the end of the day, you’ll end up creating site after site like the pros.
Read on to learn more.
Start With a Plan
Setting up a WordPress website is like building a house. You must start with a plan. What kind of website are you creating? Why are you creating the website to begin with? I mean, what would you like to achieve with the said website? Answers to these questions (among others) will inform your plan.
For instance, if you’re building an ecommerce website, you consider plugins such as WooCommerce, Ninja Shop and WP Shopify among others. You’ll also need a WordPress ecommerce theme. Additionally, you need a powerful hosting solution.
If you’re creating a portfolio site on the other hand, you need plugins that help you to showcase your work. You’ll also need a theme that fully supports portfolio features. A basic host is adequate for a simple portfolio.
See where I am going with this? Different websites will need different features and tools. Not to confuse you though (seeing as you’re a beginner), let’s get to work.
Disclaimer: For the purpose of illustration, we use Namecheap for this guide. You can, however, choose any other domain registrar and host. The process of creating a WordPress site remains technically the same regardless of the host or domain registrar you choose. If you need help choosing the perfect host for your WordPress site, we trust and recommend the hostingfacts.com website for the best hosting reviews.
What You’ll Need
- A domain name such as line25.com
- Great web hosting
- 30 minutes or less to configure it all, which includes installing WordPress
Buy a Domain Name
A good domain name is short, catchy and memorable. The domain name is your website address, or how readers recognize and find your site on the internet. Good examples of domain names include line25.com, google.com and facebook.com among others.
If you’re creating a personal blog or portfolio site for instance, you can use your name as your domain. You know, something like beyonce.com and charlimarie.com among others.
For ecommerce and business sites, you can use your business name as your domain name. For example, we use line25.com, and many other businesses do the same.
If you can’t come up with a nice domain name, feel free to use a tool such as Namemesh to get ideas based on your business name or keywords.

Many hosts nowadays offer you free domain registration for the first year. Once you sign up with the host, you start paying for the domain from the second year.
Alternatively, you can buy a domain name separately from a domain registrar such as Namecheap, and add it to your hosting account. But why buy a domain separately? Well, it offers you more control over your website address since you can add it to any hosting account.
Getting a domain name via a hosting company means you have lesser control over the domain name, since it’s owned and controlled by the same company.
Buying a domain name is easy and cheap, what with domains costing about $10 bucks per year. For instance, buying a domain name at Namecheap is a straight-forward process I wouldn’t you to run into any problems.
How to Buy a Domain Name at Namecheap
Without further ado, let us buy a domain name. Head over to Namecheap.com and enter your keyword in the search field as we highlight below.
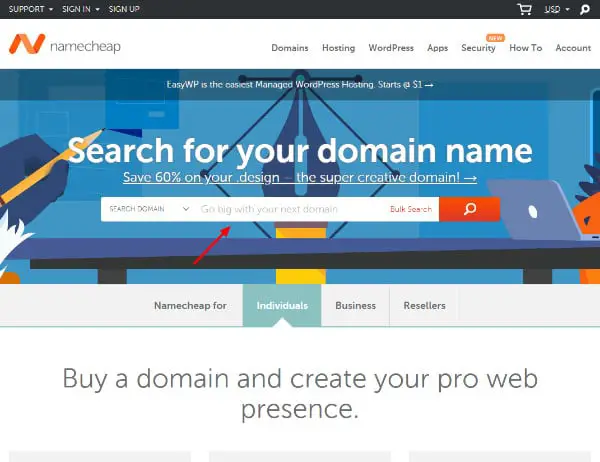
Next, hit the Search button to get the ball rolling. Clicking the search button will lead you to the following screen, where you can see different variations of your domain name.
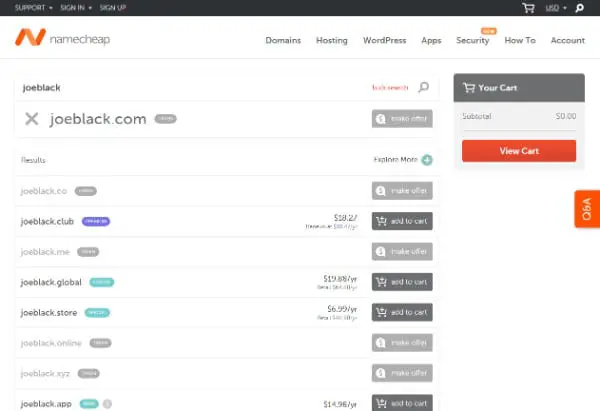
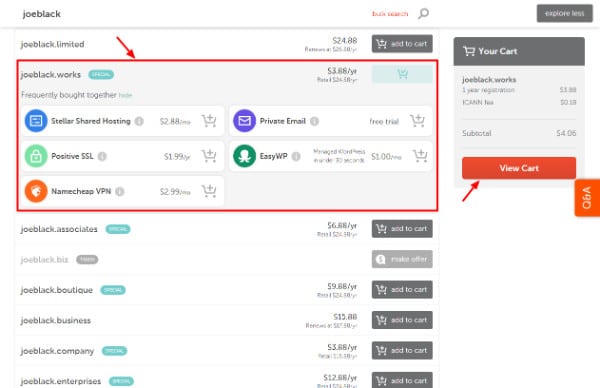
Choose one that rocks your world and hit the corresponding add to cart button. Once you hit the add to cart button, Namecheap (just like any other host) will try to cross-sell their other services to you. Ignore this, and click the View Cart button instead as shown below.
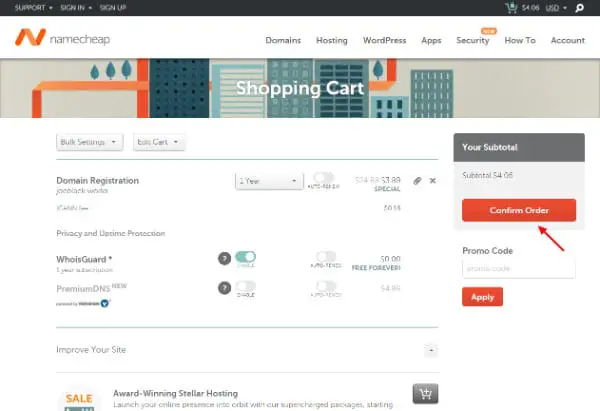
On the next screen, hit the Confirm Order button as we highlight in the image below.
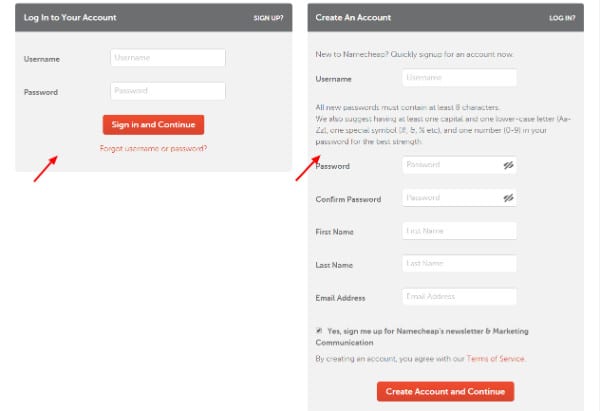
Clicking the Confirm Order button will redirect you to either login to your Namecheap account or create a new one if you’re a new customer. As a new customer, fill out the form accurately and hit the Create Account and Continue button at the bottom of the form.
After that, add your account contact information on the next page we show in the image below.
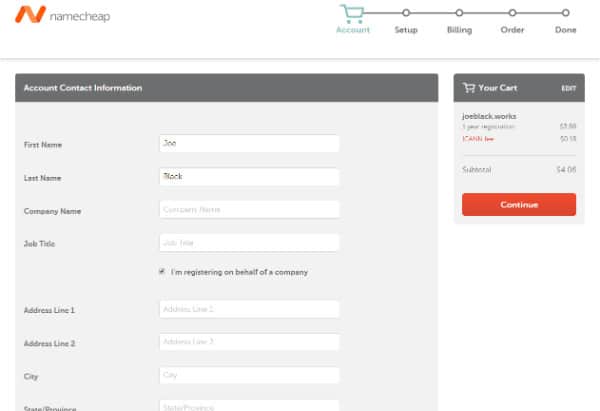
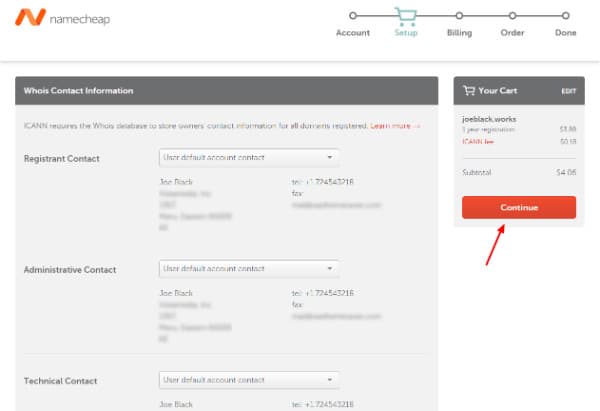
Once you’ve filled out the form, hit the Continue button. This leads you to the Whois contact information screen. Set up your Whois contact info and hit the Continue button as shown below.
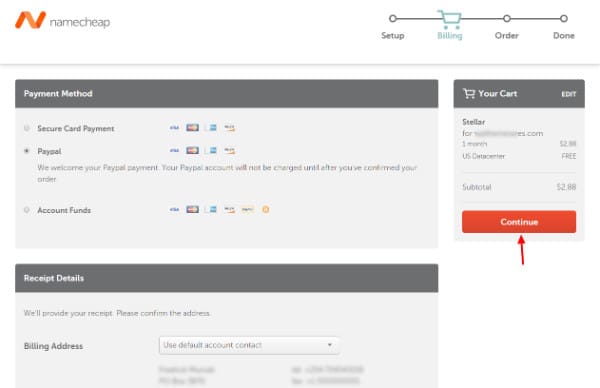
Next, choose your payment option on the billing screen and click the Continue button to complete your purchase.
Upon successful order completion, you’ll be redirected to an intuitive dashboard that looks like this:
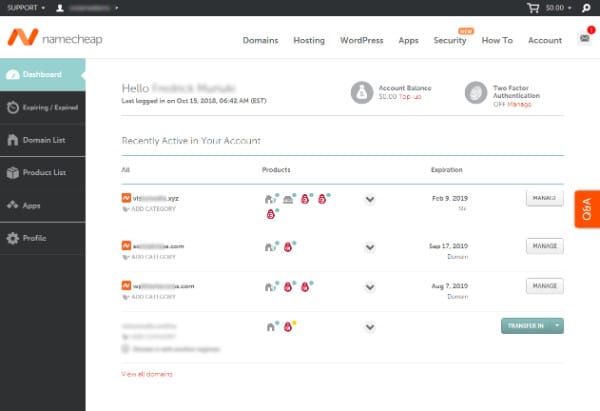
My account has a total of three domain names, but yours will only show the domain you just bought. With a domain name in hand, it’s time to shop for a good host.
Choose Good Hosting
Your WordPress site needs a good home. Just like you’d do anything for the perfect home, your WordPress site needs the best hosting to thrive.
You cannot afford downtimes and server-related errors that make your beloved WordPress site unusable at any given time. If there’s a spike in traffic, your host should shoulder the burden without taking down your site.
Choosing a good host is all about your specific website needs. Different website features have different resource requirements. Your host of choice should cater to all of your website needs.
WordPress by itself has very low server requirements. Nearly every host on the planet can host WordPress. The problem arises when you start building your website on top of WordPress and the host doesn’t have sufficient resources for your website. Only go for the best.
There’s a special group of hosts known as managed WordPress hosting. They host WordPress sites exclusively. They are a bit pricier than, say, Namecheap, but many users feel the price is worth it. Popular companies in the area include WP Engine, Kinsta and Pagely among others.
A good host provides enough resources to sustain your site. On top of that, they offer great backup plans (although you should invest in off-site backups e.g. ManageWP.com), military-grade security and world-class 24/7 support.
From personal experience, Namecheap is a decent WordPress hosting company for beginners. Besides, you can always upgrade hosting depending on your website needs.
How to Buy Hosting From Namecheap
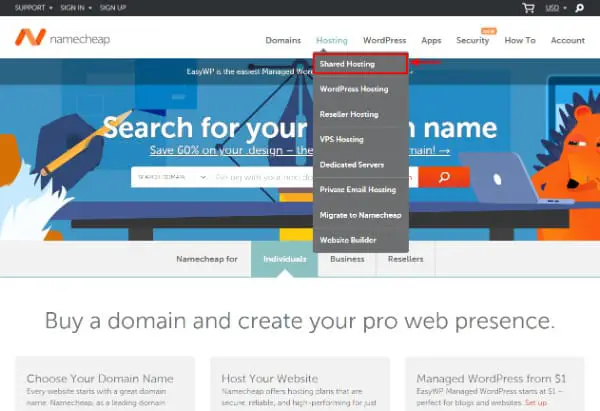
Point your browser to Namecheap.com, mouse over the Hosting menu and click the Shared Hosting sub-menu as shown below. Notice also, the other available hosting packages. For beginners though, I recommend shared hosting.
This will lead you to the pricing page for shared hosting packages. Choose Stellar, Stellar Plus or Stellar Business by clicking the respective Add to Cart button as shown below.
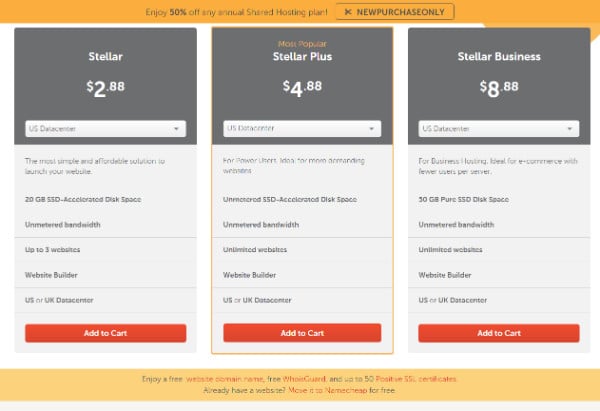
Shown above are the monthly prices for each package at the time of writing. As you can see, hosting a website is relatively cheap.
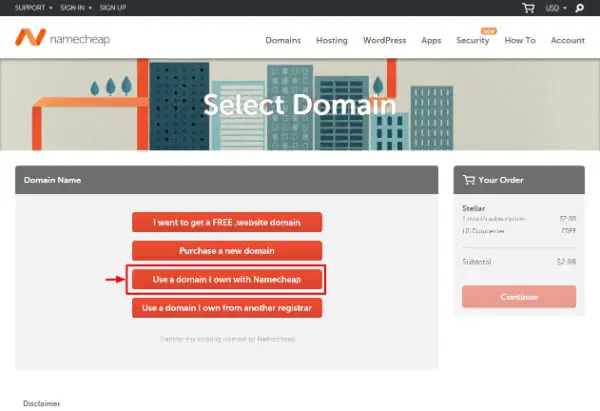
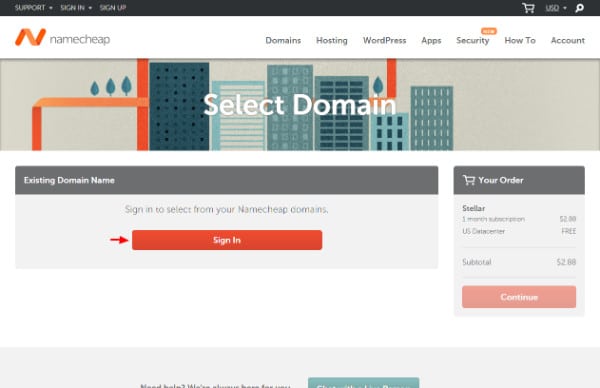
On the next screen, hit the Use a domain I own with Namecheap button as shown below.
This will prompt you to sign in to your Namecheap account. Click the Sign In button as we detail in the image below.
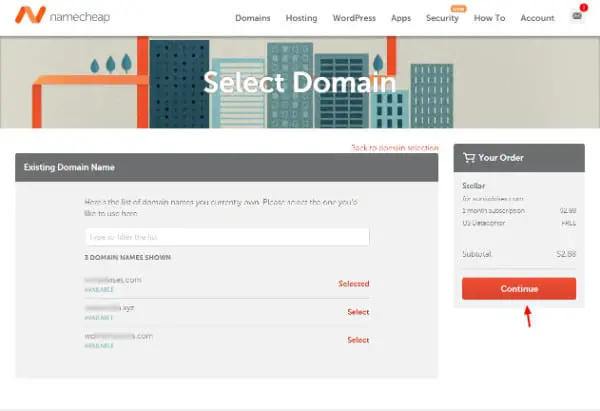
Enter your username and password to login, select the domain you’d like to use and hit the Continue button as shown below.
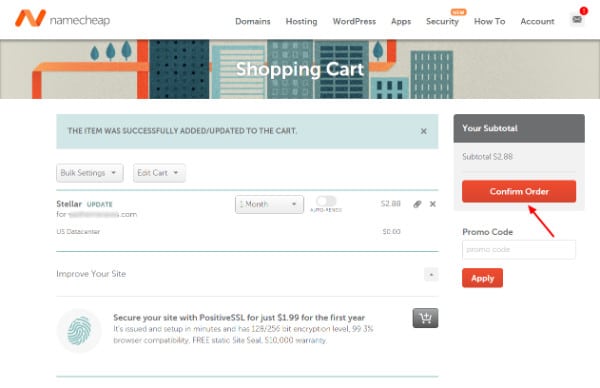
On the next screen, confirm your order by hitting the Confirm Order button as shown below.
Next, choose your payment method and hit the Continue button as we highlight below.
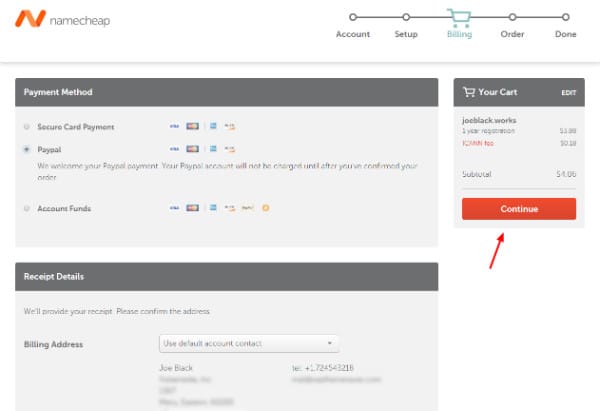
Go ahead and complete the purchase. After successfully purchasing hosting for your domain name, you will be redirected to your dashboard. You can explore all products (e.g. hosting, SSL certificates, etc) attached to your domain name as shown below.
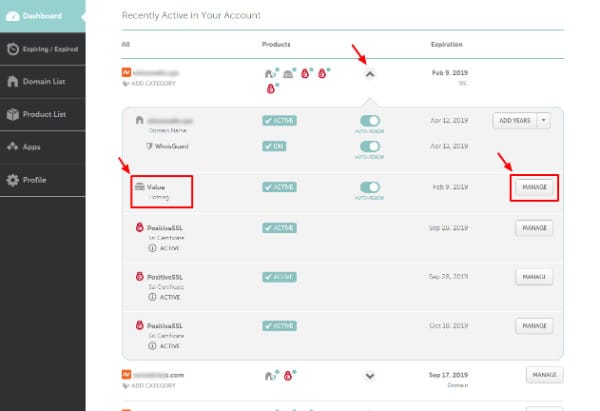
As shown in the image above, you can see Value Hosting is now attached to the domain we bought. To manage your hosting and access your cPanel, click the Manage button as shown above. Click this button leads you to the screen below.
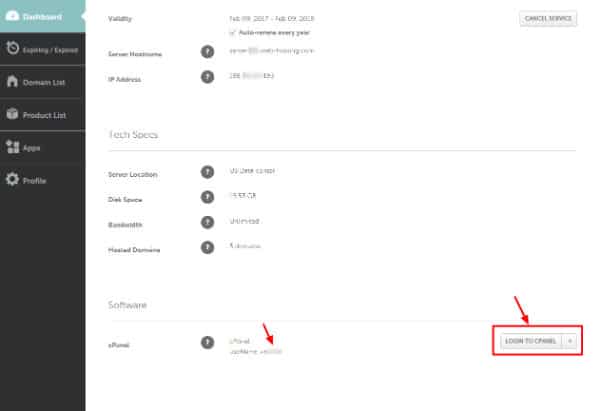
From the image above, notice your username and the Login to CPanel button. Note that you will also receive a welcome email from Namecheap with your login details and everything you need to hit the ground running.
Are you learning something?
Installing WordPress
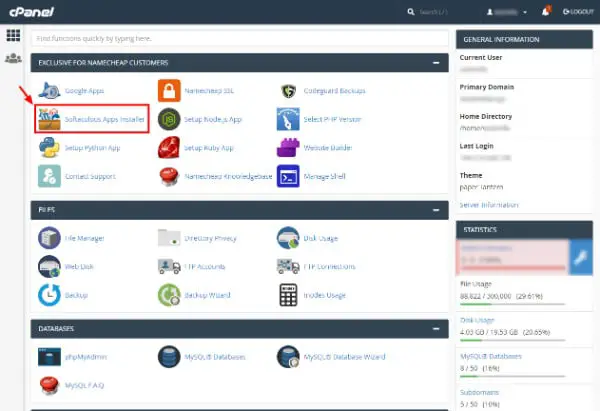
Setting up WordPress is the stuff of fourth graders. It takes less than 5 minutes once you have you domain name and hosting set.
Login to your cPanel and click the Softaculous Apps Installer button as we highlight below.
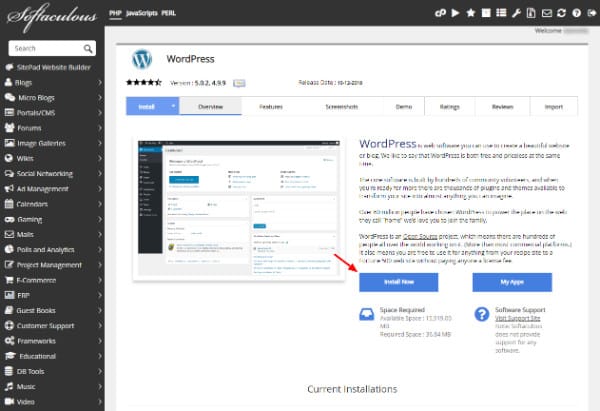
After that, click the WordPress icon as we show in the screenshot below.
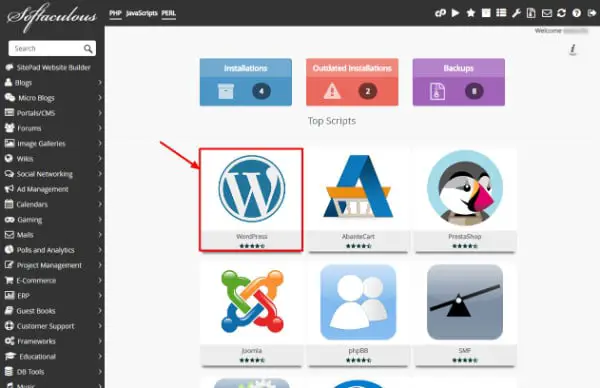
Next, hit the Install Now button to start as we detail below.
On the next screen, choose your domain name and other settings such as the site name, description and admin login details (make the details strong).
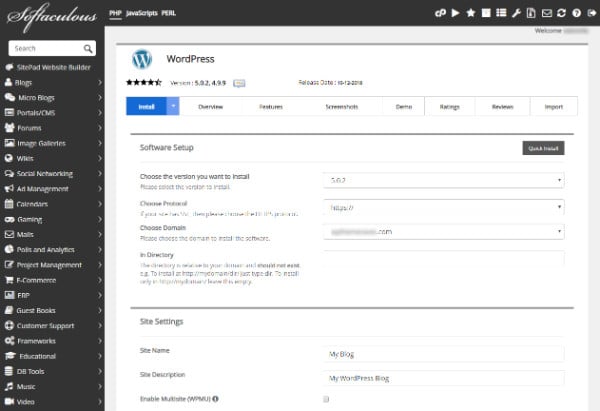
Fill out the form carefully and click the Install button at the bottom of the page. This will initiate the installation, which looks something like this:
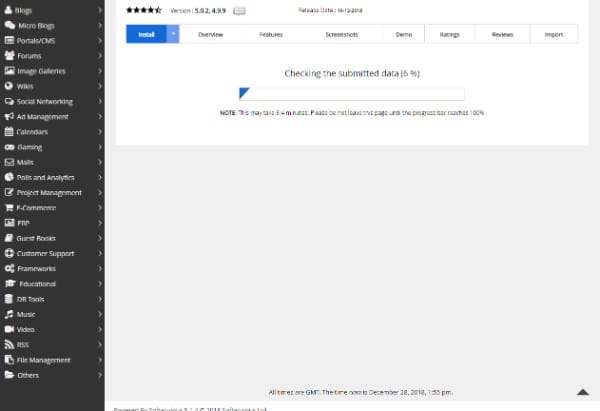
After a couple of seconds (and if everything goes well), you should see the success screen shown below.
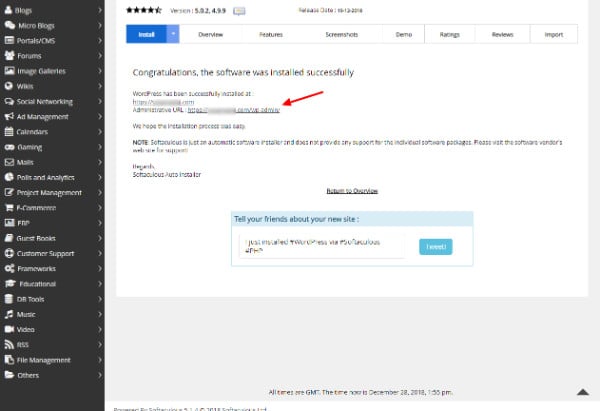
From the screen above, you can see where you installed WordPress as well as the link to login to the WordPress admin area. When you click the Administrative URL (e.g. https://yourdomain.com/wp-admin), Softaculous will redirect you to your WordPress admin login page as shown below.

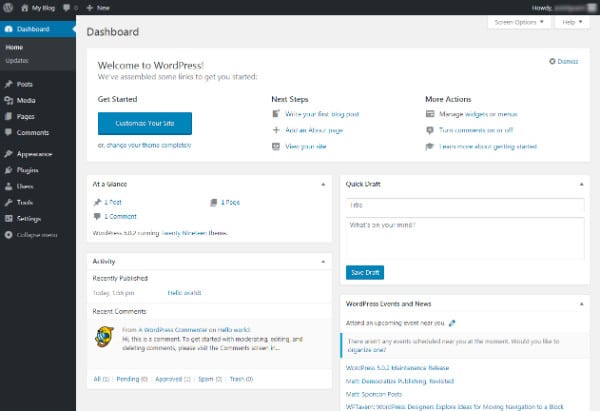
Login to your WordPress admin dashboard using the details you created while installing WordPress. Here is how the WordPress admin dashboard looks like.
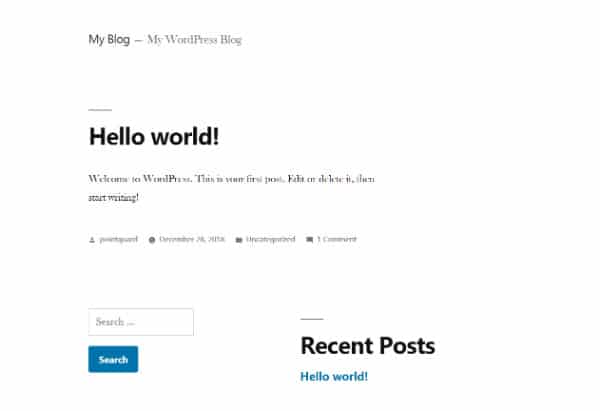
And here is how your new WordPress site looks on the front-end, complete with the default Twenty Nineteen theme.
That’s it; you now have a new WordPress site that you can customize as you desire. There are thousands of WordPress themes and plugins at your disposal, meaning you can build the website of your dreams without ever hiring a developer.
Necessary Start Plugins
After creating your WordPress site, you need a couple of start plugins to super-charge your site. Off the top of my head, I’d recommend:
- Akismet to fight comment spam
- Jetpack for a nice suite of features such as comments and automatic social sharing among others
- ManageWP to manage your site, and more importantly, create free off-site backups
- iThemes security to keep the bad guys away
- Yoast SEO so you can optimize your site for search engines like a pro
- And any other plugin that helps you to meet your goal
- Really, the plugins you end up choosing depends on your website needs
On Choosing a WordPress Theme
Choose a theme that complements your website. You can go for a theme specifically built for a single purpose e.g. eCommerce, restaurant, portfolio etc or a multi-purpose theme such as Total by WPExplorer.
Alternatively, you can start with a free theme and go premium when need be. Note, however, free themes don’t come with pro support and as many features.
Conclusion
Save for a few technical hurdles that may delay you, creating a WordPress site is both easy and cheap. Just pick a domain name, choose a good host and install WordPress.
The theme and plugins you use afterwards depend on your needs and preferences. At the end of the day, you’ll create WordPress sites like you have web design hard-wired into your brain.
Have questions or thoughts regarding this post? If so, please do not hesitate to comment below. Cheers and happy creating with WordPress!
Comments are closed.