Line25 is reader supported. At no cost to you a commission from sponsors may be earned when a purchase is made via links on the site. Learn more
Adobe offers a large variety of creative tools that can help you tremendously in the design process, whether you’re a web designer or more focused on creating prints, illustrations, and even movies. Every designer needs a little help to make their work easier and that’s what we’ve attempted to do with these tips. Many are using the Adobe Creative Cloud Express online application and some of these tips will also be applicable there.
In this article, we looked for the best 100 shortcuts and tips for Adobe Creative Tools that will help you optimize your workflow and become better at your job. These can be real-time-savers and will definitely come in handy at some point. We focused more on Adobe Photoshop shortcuts, but you will also find some Illustrator, InDesign, and Dreamweaver shortcuts and tips as well.
Adobe Photoshop includes many amazing features that you can use to create professional designs. You can definitely improve your workflow by learning a few tips and tricks that will make your life easier. Whether we are talking about keyboard shortcuts or various program features that maybe you didn’t know about, all of these are meant to help you improve your design experience.
Sponsored Ad
You will also find very useful information on various topics, for example, layers, Adobe Camera Raw, Bridge, pen tools, brush tools, how to work with RAW images, masks, useful keyboard shortcuts, and others. These are valuable tips for any designer, from beginners to experienced.
There is always something new to be learned in Adobe Photoshop / Illustrator / InDesign or other similar Adobe tools. A general trick on mastering Adobe Photoshop is to never stop learning new and faster ways to maximize your designs and to improve your workflow! Check out these shortcuts and start using them in your upcoming projects. You will not regret it!
Editors Note
Currently, Adobe is running some great promotions and discounts that may be of interest to you. If you’re not using one of their powerful creative design tools but would like to start, you may want to consider their full suite of applications available in one place online and we put together some details on Adobe Creative Cloud discounts.
What is Adobe Creative Cloud?
The Adobe Creative Cloud provides everything you need including web services, apps, and tons of resources for every kind of creative projects such as web design, graphic design, photography, video editing, UX design, painting, drawing, social media, and much, much more. You can build your own plan or subscribe to the Creative Cloud All Apps plan. Discover more about all Adobe’s plans here.
01. Use Camera Raw as a plugin
You can use Camera Raw as a live smart filter in Adobe Photoshop. All you need to do is to select it from the Filters menu with a layer selected to open the Camera Raw dialog. Because it is a smart filter, you can then mask, deactivate or change settings later on.
02. Grade your footage quickly
You can group individual assets and send them to SpeedGrade to get color treatments. This can be used with both compressed and RAW files. If there is a compressed format, you need to choose File>Send to Adobe SpeedGrade to render out a DPX sequence which then automatically opens it in Speedgrade. When using a RAW file format, you must export an EDL file by choosing File>Export>EDL.
03. Creative Cloud Assets
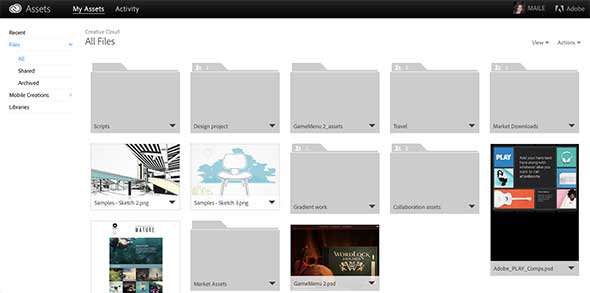
This is a great tip that helps you rapidly save files to the Adobe Creative Cloud and use them later on. When you save a file into the Creative Cloud Files folder, your file will automatically be uploaded. There is more on this in the Creative Cloud Libraries.
04. Copy CSS styles directly from Photoshop
Here is another neat trick that you can use in Adobe Photoshop CC. When using Photoshop CC, you can copy and paste CSS code on any selected layer. You need to go to Layer>Copy CSS. This will copy all relevant styles and these will be ready for pasting into Dreamweaver.
05. Use Typekit in ReFlow
To make things easier, you can use Typekit by accessing it directly through ReFlow. All you need to do is to select your desired text block and click the Typeface button in the Properties panel. Then, choose Manage Fonts and select between Edge Web Fonts, or type your own Typekit kit ID.
06. Create a Premiere Pro sequence from clip
Here’s how you can create a Premiere Pro sequence from any clip you want: inside Premiere Pro CC, right-click on the specific clip and choose New Sequence From Clip. It will automatically create a project timeline matching your clip’s frame rate and resolution. It will also place the clip at the beginning of the timeline.
07. Use Typekit desktop fonts
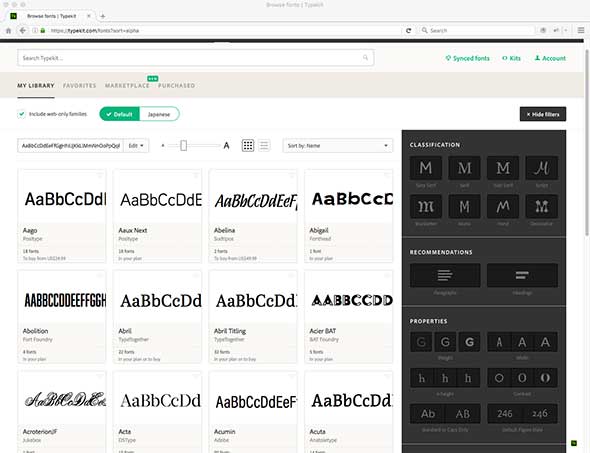
Creative Cloud has a neat feature, Typekit desktop font service, that helps you increase your workflow across all apps. You can use synced fonts for website mockups, word processing, and more.
08. Touch your type
Here is a neat tip that saves you a lot of time when working in Illustrator CC. You can use the Touch Type tool that lets you edit each individual character. You may then change their position, rotation, and style, without having to outline the type.
09. Add Edge Animate projects to Dreamweaver
You can add Edge Animate projects to Dreamweaver, and you can do this within your web pages. When in Edge, you need to place your cursor in the location where you want your project inside Dreamweaver. Then, go to Insert>Media>Edge Animate Composition, select the project, and preview it in Live View to see the animation in place.
10. Use Adobe Exchange Manager
You can use the Adobe Exchange Manager panel to gain quick access to a great variety of extensions and plugins. You just need to go to Help>Manage Extensions to launch the app.
11. Font search
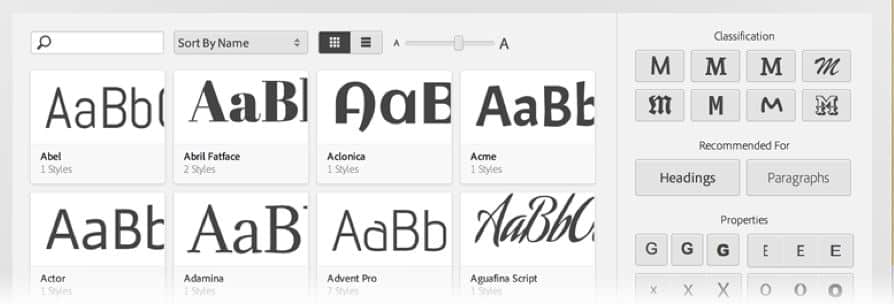
There are a variety of Creative Cloud applications that have had their type engines updated as part of the update from CS6. This update eases your work, making it easier to identify a font that you need. To use it you need to type the font’s name that you want to find in the type panel, and you will get a filtered list, where you can rapidly find what you need.
12. Import color swatches to Photoshop
You can load color swatches directly into your workspace in Adobe Photoshop CC. You need to open the Swatches panel, choose Load Swatches from the drop-down menu, navigate to an HTML, CSS or SVG file and click OK. This will automatically add a new set of swatches.
13. Change ruler units
This is a neat tip on how to rapidly change the ruler’s units. The classic way is to do this in Photoshop, is to go to Photoshop> Preferences>Units and Rulers (or Edit>Preferences> Units and Rulers on a PC). The easier way is to simply right-click on a ruler and choose your desired unit.
14. Unembed images in Illustrator
If you have copied and pasted images from Adobe Photoshop, the web, or another app to Illustrator, you can easily unembed them all together, if needed. You just need to select the images and click the Unembed button in the control panel.
15. Generate CSS transitions in Dreamweaver
Dreamweaver works very good with Edge Animate, but if you want to create a basic CSS transition, you don’t need to make a separate animation project. Just choose the desired elements and open the CSS Transitions panel. You can then apply a set of properties and rules to your element.
16. Quickly create an automatic slideshow in Premiere Pro CC
You can generate an automatic slideshow in Premiere Pro CC. Here is how you can do that: import a folder of images directly into your project, click/drag/drop them into your desired order. Select all the images and choose the Automate to Sequence button to generate a slideshow with default transitions in place.
17. Editable shapes in Photoshop
When working with Adobe Photoshop you will definitely use Smart Objects. In this manner, you can use vector artwork from illustrator directly into the Photoshop file. But if you just want a basic vector shape, you can generate editable rounded corners on standard shapes. To apply this you need to open the Properties panel, having selected whichever shape tool is active. This will give you access to editable corners at any stage.
18. Remove camera shake
In Photoshop, you can use a blur reduction filter, to create still images. This is located under the Sharpen section in the Filter menu.
19. Inspect your website everywhere
You can use Edge Inspect to debug a website that was created using Dreamweaver or Muse. You can access this function from a mobile or from a desktop. Just install Edge Inspect from Creative Cloud on your computer, download the Chrome plugin and the iPad app.
20. Record and embed audio
If you are using Creative Cloud, you may have seen the Adobe Audition function. This lets you easily move audio in and out of your Premiere Pro and After Effects projects. It will also include support for multi-track files. You can send any audio to Audition by right-clicking on the track and then choosing Edit in Adobe Audition> Sequence.
21. Publish websites with Business Catalyst
You can use the Business Catalyst hosted platform to instantly deploy a new Dreamweaver or Muse project to the web. This is s part of the Creative Cloud service and it gives you a full integration that lets you publish just by using a single click.

22. Synchronize your settings
When using Creative Cloud you need to successfully sync your settings across different installations. You may find this feature on most of the CC application. You can enable this by going to the Preferences panel in each and enable synchronizing to automatically keep your workspace up-to-date. You can then sync your data from any device.
23. Use Photoshop to prototype responsive designs
Photoshop CC features Adobe Generator, a very useful workflow tool which lets you export mockups directly to Adobe Edge ReFlow. You can make a new Edge ReFlow project from the Photoshop document by going to File>Generate and choosing Edge ReFlow Project.
24. Browse fonts in Dreamweaver
Dreamweaver CC comes with a built-in web font browser, Edge Web Fonts. If you want to browse for a specific font, you need to choose Modify>Manage Fonts, then search your font in the list. When you find it, just click on it and you are done.
25. Get Kuler themes in Illustrator
You can create a new swatch and send it to Illustrator CC. When in Illustrator, sign in to CC, open the Kuler panel and then click refresh until you see the new swatches.
26. Create an iPad app with InDesign CC
Then in InDesign CC, you can create applications for iPad and other devices. Just create a template and add your desired interactive elements. Then, from the Folio Builder panel, select the Create App menu option to automate a wizard that takes you through each step.
27. Smarter automatic processing in Photoshop
This is a neat tip that will save you a lot of time. In Photoshop you can use actions to ease your workflow and to automate specific tasks.
28. Create a video production workflow
You can create a script in Adobe Story and then import it into Prelude. This helps you generate searchable metadata which can be instantly assigned to assets and into Premiere. You can use the Adobe Anywhere integration that is located on File>Adobe Anywhere. This lets collaborative editing.
29. Create a sketch in Adobe Ideas and then complete it in Illustrator CC
Create a sketch in Adobe Ideas app from your touch device and finish your work in Illustrator. You can save your sketch to the cloud, then go to the Creative Cloud website, or use the file sync function to select the Ideas file and open it in Illustrator.
30. Quickly change fonts in Photoshop
When working in Photoshop, you may have new fonts added to your project. You can update all the layers to use the new font very fast, without having to modify each individual layer. To do this you need to Ctrl+click each type layer, choose the Type tool and select your the new font. This will automatically apply to all layers.
31. Export layers from Illustrator to Photoshop
When you have finished a design in Illustrator, you can easily export it to Photoshop, if needed. Simply go to File>Export and select the Photoshop format. You can select the resolution that you want and make sure that the Write Layers option is selected before clicking OK.
32. Easily import projects created in Edge Animate to InDesign
You can add into your InDesign file various projects from Edge Animate.To do this, go to Edge Animate CC, choose a poster image by clicking the camera icon from the Properties panel. Then, publish in the OAM format. This will generate a project that is fully compatible with InDesign CC.
33. Generate QR codes in InDesign
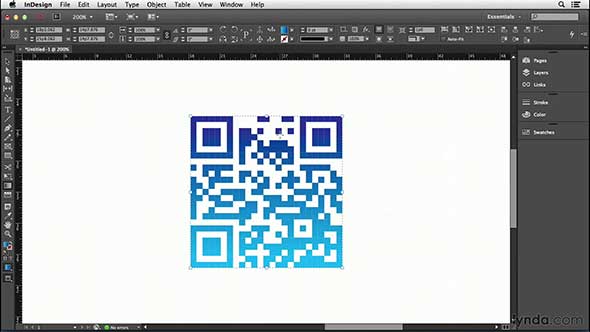
Create a QR code that you can then use to rapidly access your website from your mobile phone. When in InDesign CC, you can generate QR codes rapidly, without having to use a third-party service. Just make a frame and navigate to Object>Generate QR code. Select Web Hyperlink, copy and paste your URL into the URL field.
34. Replace Premiere Footage with an After Effects Composition
Premiere Pro is compatible with After Effects. You can rapidly substitute any footage with an After Effects composition of the same length, resolution and frame rate. To do this, from your timeline, you need to right-click on a clip and then choose to Replace With After Effects Composition. This will generate a new project with matching properties.
35. Export video and HTML from Flash CC
You can export from Flash in an SWF format but not all devices are compatible with this. Therefore, you can export as an HTML and video, which is ready for deployment directly into a Dreamweaver or Muse project.
36. Extract CSS from Illustrator
Illustrator enables you to export CSS, just as Photoshop. Create your design, and then open the CSS Properties panel to get a view at the compatible visual characteristics rendered as CSS code that can be copied and pasted into Dreamweaver. You can use this with CSS gradients, to create excellent gradient backgrounds.
37. Publish to ePub from InDesign
InDesign CC uses ePub publishing tools to successfully export your document in a format compatible with eReaders. Simply go to File>Export and select the ePub format to get started.
38. Render using Adobe Media Encoder
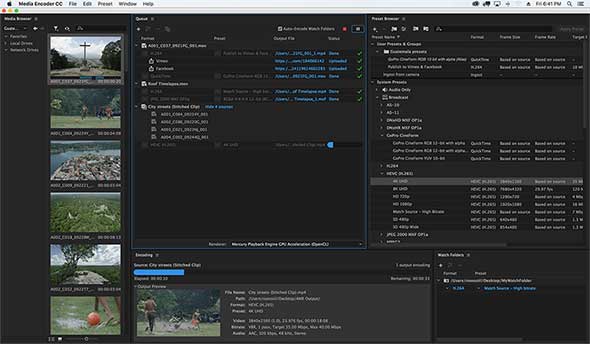
Adobe Premiere Pro CC and After Effects CC are using the Adobe Media Encoder (AME) as their primary output module. This lets you work while the files are rendered in the background. Just export your work as you normally do, and select the the AME option to pass the rendering job off to be encoded.
39. Easier marquee selections
Simply select any Marquee tool, hold down Alt to begin a selection at the center point, and then hold Space to temporarily move the selection where you want.
40. 1000 history states
You may sometimes need to have more history states. For this, you need to navigate to Edit>Preferences>Performance and change the number of History states. You can have a maximum of 1000. Increasing this number has an effect on performance.
41. Rotating patterns
Create kaleidoscopic patterns by using a keyboard shortcut. Just press Ctrl+Shift+Alt+T and duplicate a layer and repeat a transformation in one go. For this, you can use any shape, image or effect you like. Simply make the first rotation by using Ctrl+T and turn slightly and hit Enter to apply. Then, use Ctrl+Shift+Alt+T repeatedly to create the final pattern.
42. Bird’s eye view
You can hold down H and drag the image to instantly jump to full screen and then go to another area. This is useful when working very close, with a large zoom in.
43. Close all images
This is a simple but very useful tip. If you need to close all your documents simultaneously, simply Shift-click any image window’s close icon. This will apply to all.
44. Interactive zoom
You can use interactive zooming by holding Ctrl+Space and then drag right to zoom in, or left to zoom out. This follows the mouse icon so you can use it to rapidly move along your design.
45. Undo, undo, undo
When working in Adobe Photoshop, you can use Ctrl+Z to Undo, but you can also use Ctrl+Alt+Z to undo more than one history state. Try it out!
46. Combine images with text
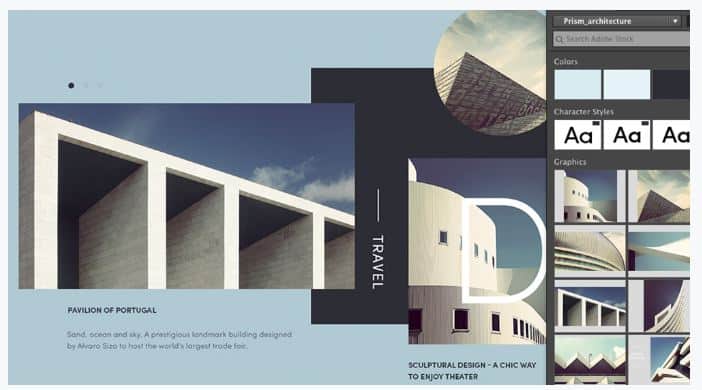
This is a neat trick in Photoshop with a great impact. Drop any image layer over a type layer then hold down Alt and then clip the image to the text in the Layers Panel.
47. Funky backgrounds
You can change the default gray background to anything that you like. Just shift+click on the background area with the Paint Bucket tool active to create a fill with the foreground color. You can then right-click it to go back to gray.
48. Diffuse effects
You can use the Diffuse Glow filter to create highlights for a soft ethereal look. Simply press D to reset colors then go to Filter>Distort> Diffuse Glow. Then go to Image>Adjustments>Hue/ Saturation and drop the saturation down to finish the dreamlike effect.
49. Merge a copy of all Layers
Press Ctrl+Shift+Alt+E to merge a copy of all Layers. This is very useful. Try it out!
50. Reset foreground and background colors to black and white
You can rapidly reset foreground and background colors to black and white. For this, you just need to press the letter D.
51. Change your foreground and background colors
Use the letter X to instantly change your foreground and background colors.
52. Change the brush size
You can change the brush size, when having the brush tool selected, by using the ] and [ to decrease and increase the size.
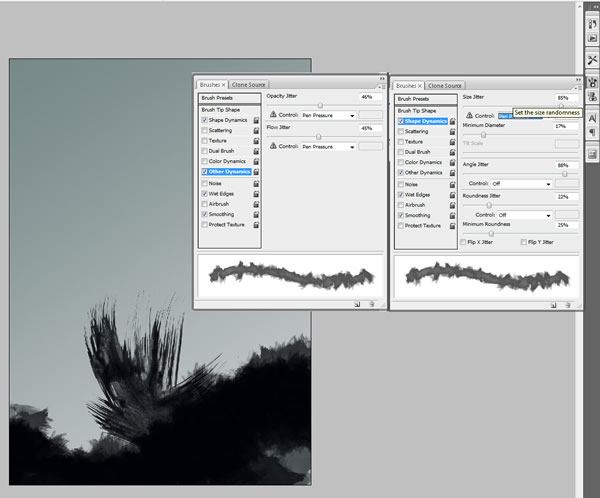
53. Duplicate a layer or selection
Use the Ctrl+J command to duplicate any layer and selection. This comes in handy many times.
Press and hold space bar and drag to navigate around the image. This is a neat tip to visualize your artwork.
55. Hides or shows all panels and tools
You can use the TAB key, to instantly hide or show all the panels and the tools. You can use this trick when you need more space.
56. Transform a layer
You can use the Ctrl+T keyboard shortcut to instantly transform a layer. This is the fastest way, without having to go to the Menu.
57. Merge selected layer down, or several highlighted layers
Use Ctrl+E to merge selected layer down, or to merges several highlighted layers.
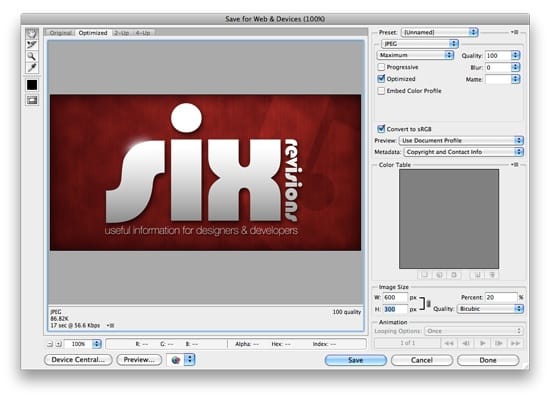
58. Save for web & devices
This is another useful shortcut that lets you rapidly save your file for web&other devices. Just press Ctrl/Ctrl+Shift+Opt+S.
59. Bring up levels box
You don’t need to go to the levels panel to use levels. Just press Ctrl+L. This instantly brings up the levels box.
60. Open curves
Use the Ctrl+M shortcut to rapidly open Curves. You can save some time by using this tip. Try it!
61. Create a clipping mask
You can rapidly create a clipping mask by using Ctrl+Opt+G. This comes in handy and it can be a real time saver.
62. Fit on screen option
By pressing the Ctrl+0 keys you can have your design instantly fit your screen. You can do this at any zoom level.
63. Increase/decrease the size of text
You can use Ctrl+Shift+>/< to increase or to decrease the size of the selected text by 2pts. You can also use Ctrl+Option+Shift->/< to increase or decrease its size by 10pts.
64. Increase/decrease brush hardness
Use the } or { symbols to rapidly increase or decrease the brush hardness. This trick saves you a lot of time.

65. Select the previous or the next brush
You can use ‘,’ or ‘.’ from the keyboard to browse through brushes, without having to open the specific panel. You can also press ‘<‘ or ‘>’ to select the first and last brush.
66. Bring layers forward or send backward
Use the Ctrl+] to bring layers forward or Ctrl+[ to send them backward. You can also use Ctrl+Shift+[ to send a layer to the bottom of the stack, or Ctrl+Shift+] to bring it to the top of the stack.
67. Edit multiple type layers
You can easily apply a change to multiple layers at the same time by holding down Ctrl and click the layers in the Layer Panel to select them. Then select the Type tool and change the font or the size in the Option’s Bar.
68. Converting layer styles
You can convert any Layer Style to a regular pixel-based layer by adding a style and then right-click Effects and select Create Layer. This gives you more control to edit the contents.
69. Layer mask views
You can view the layer mask by holding down Alt and click the desired Layer Mask. To close it hold down the Shift key and click to turn the mask off.
70. Quick full layer masks
You can use Alt-click directly on the Layer Mask icon to apply a full mask that will hide everything on the layer.
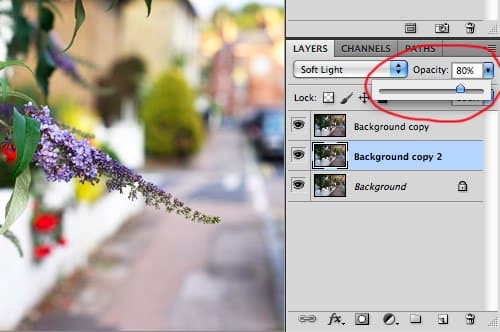
71. Change opacity
You can change the opacity really fast and easy. Simply type 1 for 10%, 5 for 50%, and 0 for 100%. This is a neat tip that will save you time. Try it out!
72. Non-destructive crops
This is a very useful tip that helps you master the crop tool. You can crop any part of an image without any destructive effects. Just make the Background Layer editable first, by double-clicking it and then hitting OK. Then, select the Crop tool and drag a crop window. Before applying the crop, check Hide in the Options.
73. Path options
Alter making a Path with the pen tool, you can right-click to get many useful options, such as Make Selection, Fill Path, and Stroke Path.
74. Magnetic pen
You can have a magnetic pen that helps you ease your work. This behaves just like the magnetic Lasso Tool. Simply select the Freeform Pen tool from the Tools Panel and then check ‘Magnetic’ in the Options Bar.
75. Change the brush angle
If you want to change the brush angle, you need to click the Brush Panel in the Options Bar and then select Brush Tip shape and drag the circle to change the angle of the brush.
76. Real paint ridges
You can use the Bevel and Emboss filter to make brush strokes more like ridged layers of paint. You can merge a copy of all the layers, set the Blend Mode to Overlay and then apply the Bevel and Emboss filter for a neat result.
77. Tilt canvas
You may sometimes need to tilt the canvas to ease the designing process. For this, you simply need to hold down R then drag it around. You can release the R key and it will automatically switch to the original tool. To revert the canvas back to normal, just hold down R and then click Reset View in the options.
78. Add texture to paintings
You can make your paintings more realistic by adding a paper texture over your design. For this, you need to copy a texture over your image, then use the Blend Modes and Opacity options until you are satisfied with the result.
79. Smudge painting
Smudge painting is a quick way of getting great results. You need to fill a layer with an off-white tone, duplicate the Background Layer and then move it to the top of the stack, with 13% opacity. Select the Smudge tool, check Sample All Layers, and start painting. That’s all!
80. Create a brush
Photoshop lets you create a brush from any image you want. You need to convert the image to monochrome, make a selection, and then go to Edit>Define Brush Preset. This will make only the dark parts into a brush so if you need a clearer shape you need to isolate the object against a white background.
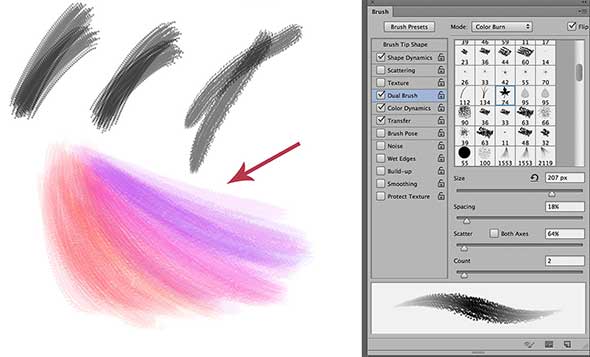
81. Experiment
You can use the Brush tool for many purposes. The best way to see what you can do with it is to simply, experiment! Select a color and start creating. You can use various Blend Modes, add Layer Style, and more.
82. Make sketch lines
You can convert a photo into a painting by adding sketch lines for a more realistic effect. Simply navigate to Filter>Stylise>Glowing Edges, invert the colors, desaturate, and select the Darken or Multiply Blend Mode. Enjoy!
83. Draw straight lines
You may sometimes need to use straight lines. For this, you need to use the Brush tool, hold down the Shift key, and click two points.
84. Dodge or burn
When using the Burn tool, you can hold down the Alt key to rapidly switch to the Dodge tool. This saves you a lot of time.
85. Sample a color
When having the Brush tool activated, you can hold down the Alt key and sample any color from your project. This will be automatically set as the Foreground color.
86. Get a pen and tablet
If you are a professional designer, but not only, you may need to consider purchasing a pen and a tablet. This can let you express your creativity in a new manner. Take a look at some devices!
87. Use select all
You can use Select All to make changes that will apply to all your images from the file. You need to open them in ACR, select all, and then star making the changes to an image. This will automatically modify them all.
88. Mask sharpening
This tip lets you control which areas of an image you want to sharpen. For this, you can use the Masking slider in the Detail Panel. It will display a greyscale view, where the black areas are protected from sharpening, letting you isolate the desired areas.
89. Open smart objects
When holding down the Shift key in ACR, the Open Image button turns into Open Object. This lets you open a file as a Smart Object, which lets you double-click the layer thumbnail and edit the layer in ACR.
90. Reset the sliders quickly
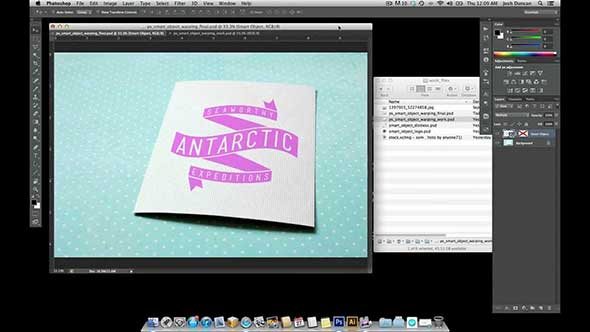
You can double-click on any slider to make it reset to 0. When you click one time, it will jump to the point you’re over. You can also use this trick as a ‘before and after’ view to better view your adjustments.
91. Exposure before color
You definitely should adjust the exposure before moving on to using color correction.
92. Crop ratios
You can use square crops to make your images different from the rest. To create various crop ratios, simply hold down the mouse button over the Crop tool. Cropping in this manner is non-destructive, which means that you can try out various sizes until you get what you want.
93. Adjustment brush controls
You can use the Adjustment Brush for selective toning in ACR. The brush is working by setting pins, each is linked to a painted mask that identifies the exact region that you want to tweak. You can view the mask while painting, and then hide it to use the sliders to adjust the area. Press the Y key to rapidly switch the view of the mask on or off.
94. Clipping views
You can see any clipped pixels by holding down the Alt button while dragging the Exposure, Blacks or Recovery slider. You can also click the icons at the top right and left of the histogram to see them permanently.
95. 3D carousel view
Use this tip to make your image presentation more interesting. Simply use Ctrl+B to visualize your images in a 3D carousel view. You can scroll through the images by using the arrow keys and also remove the ones you don’t need.
96. Stack similar images
You can use this tip to rapidly stack images and keep your workspace clear. You need to select a group of files and go to Stacks>Group as Stack.
97. Paste ACR settings
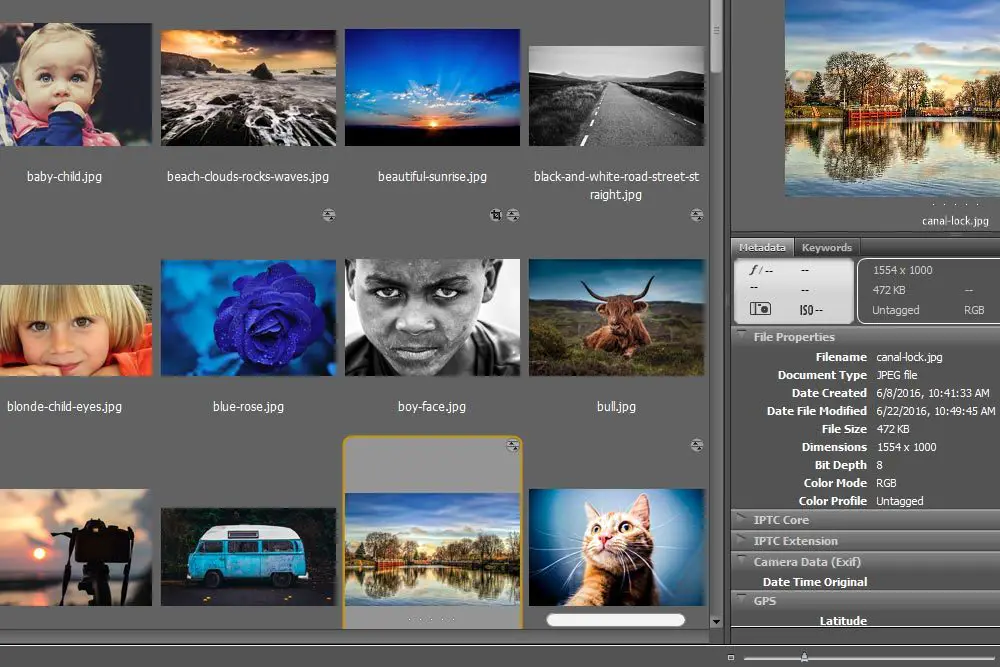
This is a neat trick that lets you paste ACR treatments from one file to another in Bridge. Just right-click any file with the circular ACR icon and go to Develop Settings>Copy Settings. Then, right-click another file and choose Paste settings.
98. Open in ACR
Raw files open automatically into ACR and you can do that too with JPEGs and TIFFs. Simply right-click them and choose ‘Open in Camera Raw’, or use the keyboard shortcut Ctrl+R.
99. Crucial selection shortcuts
When having a selection tool, you can hold the Shift key to add to an existing selection or the Alt key to subtract from it. You can also use Shift+Alt together to intersect selections.
100. Open as layers
You can easily insert a group of images into any layers from a single document simply by going to Tools> Photoshop>Load Files into Photoshop Layers.
Conclusion
You may want to also check out this list of 100 Photoshop Tutorials to help you even more with your Adobe skills. This completes our list of 100 most useful adobe tips and tricks. Do you have any to add to the list? Which ones from the 100 tips above have you found most useful? Which ones were you surprised about? Please don’t be shy and leave a comment below.

Comments are closed.