Line25 is reader supported. At no cost to you a commission from sponsors may be earned when a purchase is made via links on the site. Learn more
How to Use Canva for Beginners: Step-by-Step Guide

You may be wondering How To Use Canva as a beginner. Well, you are on the right site because this Canva for beginners guide we crafted will surely help you successfully create your very first design.
What is Canva?
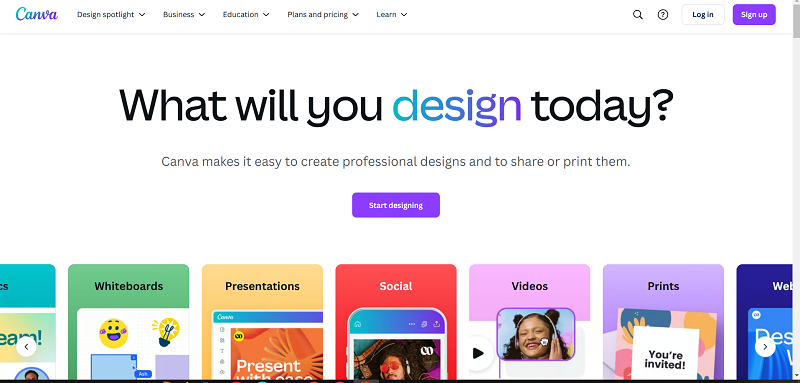
Canva is a free-to-use graphic design platform used to create print products, social media posts, merchandise designs, business presentatioans, video presentations, and more. It is beginner-friendly since it uses a drag-and-drop interface which makes its tools and features a whole lot easier to manipulate. While Canva offers a Free service, it also offers Canva Pro which is a paid version that gives you access to advanced features and premium elements, stock photos, stock videos, fonts, and templates.
You might be worrying about how to begin your design adventure, but fret not, for we prepared a simple and easy-to-follow 2025 Canva user manual tailored for you! Head on over to Canva’s website to get started.
How to Use Canva for Beginners
1. Log-In or Sign-Up
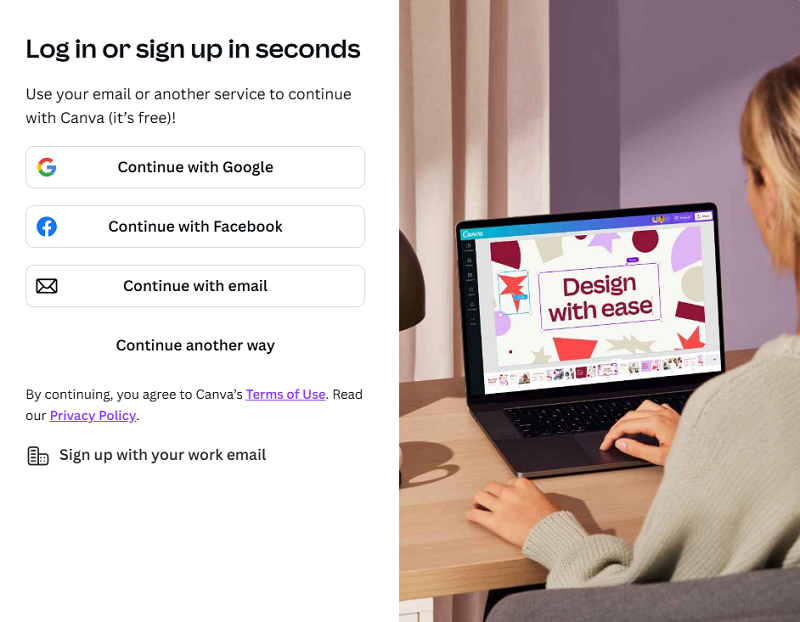
- Apple
- Microsoft
- Clever
- Work Email
- Mobile
2. Exploring the Homepage
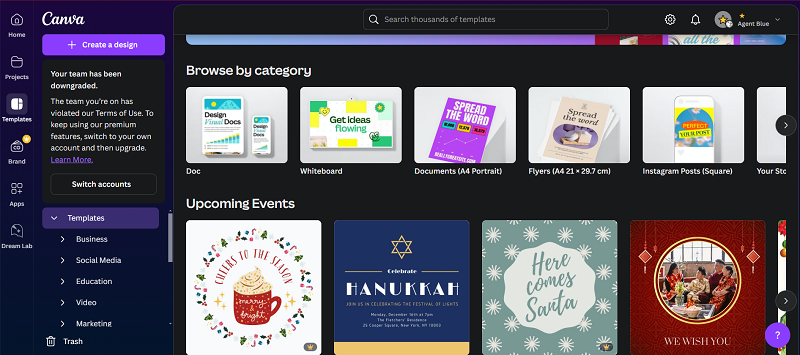
Now that you’re done with the first step, it is time to do some exploration. As a beginner, you may feel a bit overwhelmed, especially not knowing what to do. But, trust me, it is definitely okay to feel lost at first because after some getting-used-to, it will be a whole lot better!
Canva’s homepage is pretty easy to navigate and we are here to guide you through it. As Canva directs you to its homepage, you will immediately see an array of suggested designs you can create. However, before we dive into that, let us first navigate the dashboard.
In Canva’s left side vertical toolbar, you will see six icons which are the following:
Home – In Canva’s homepage, it presents the highlighted and latest features of Canva presentations. As mentioned, you can also find the different suggested designs to create here.
Projects – Any design you have created or is currently working on will appear here. Folders of different sets of designs you will be creating later on will also be compiled here.
Templates – In this section, you will find suggested templates for different design categories. To make things easier for you, Canva also categorizes sets of templates according to the purpose of your design, whether it may be for business, education, social media, marketing, and so on. Just simply scan through the templates and you will eventually find the perfect template to work on!
Brand – This section is actually intended for Canva Pro users. This feature helps businesspeople or entrepreneurs create or design brand assets. As a beginner who is likely using Canva for personal use, this feature might not be that much of an importance for you to use unless you intend to set up a brand.
Apps – What makes Canva unique and striking is its Apps feature. In here, Canva offers or connects to a seemingly limitless number of apps that you can use to level up your design. It even offers you AI-powered apps that can help you with creating your design.
Dream Lab – Speaking of AI, here is another exciting feature of Canva that you can explore later on. Canva’s Dream Lab is a latest feature which allows users to create a variety of AI-generated images by simply typing in a design prompt. With just prompting Canva with a few words, you can make your dreams come to life!
Trash – As the name suggests, any design you trash will end up here. Canva will give you 30 days to restore them before they are automatically or permanently deleted.
On the top part of Canva’s page, you will also see the Search Bar, this will help you quickly find templates or design elements.
Bit of a long ride there, huh? But hey, we got through it. Now, it is time, let us create your very first design!
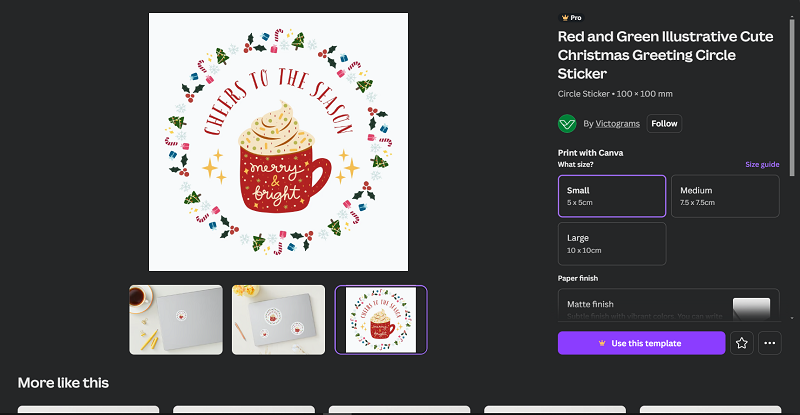
3.Creating Your Design.
4.Exploring the Design or Editing Tools
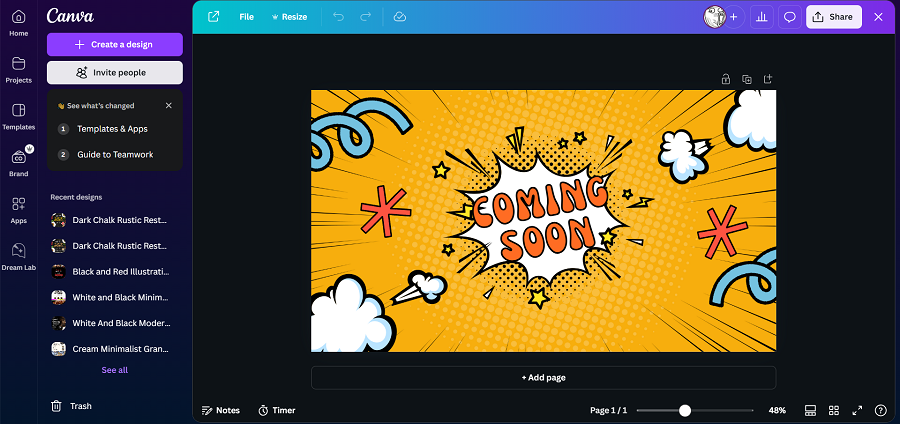
Before you start editing, let us help you familiarize the design or editing tools first to make things go smoothly as you work.
After choosing a template or design, Canva will direct you to the Design Page. In this page, you will notice a Toolbar on the left side which is comprised of the following:
A. Design
This tool will enable you to use design templates that you can adapt to your canvas or select from Styles which provides you font sets, color palettes, or combinations of fonts and palettes to use for your design
B.Elements
This tool gives you easy access to thousands and a variety of design elements. These design elements include shapes, graphics, stickers, photos, videos, audio, charts, polls, frames, mockups, and even an AI image generator. Moreover, you can just use the search bar to find whatever you need for the design.
To edit a design element, simply select the element and a small horizontal toolbar will appear on top of the page. Here, you can choose to edit the element by changing its color, creating a border, adjusting its shape, cropping it, rotating it, adjusting its transparency, arranging its position, and even selecting an animation for it.
C.Text
There is no doubt that every design needs a text. To add a text, just tap on the “Text” bar to add a heading, subheading, or body text.
Just like the design elements, you can also edit a text to your heart’s desire. To edit a text, simply tap on it and a similar small horizontal toolbar will also appear on top of the page. Here, you can edit the text by changing its color, changing the typeface, changing the font’s style, changing the letter’s case, adjusting the size, selecting the alignment, using text effects, arranging the position, and also selecting an animation for it.
D. Uploads
This feature enables you to upload files from your computer which include photos, videos, audios, or gifs that you wish to use in your design. You can also upload files from Google Drive, Dropbox, or Google Photos.
E. Draw
This feature gives you the liberty to be more creative in your design. Draw allows you to use digital drawing materials like pen, pencil, marker, and eraser to liven up your design. You also can change the drawing materials’ color or adjust its size and transparency.
Other editing tools may also be seen if you tap on an element or text. After tapping on an element or text, you will find a smaller toolbar floating on top of it. This small toolbar enables you to use other common editing tools like copy, paste, duplicate, delete, comment, link, or lock.
It is important to note that some advanced features or premium elements of Canva will not be available in the Free version.
Now that we have taught you how to use canva, you can take this opportunity to experiment with Canva’s magic and finish your first masterpiece!
5.Saving Your Design and Other Options

Once you are done with your design, there is only one thing left to do which is to save it. You have come so far and you are about to reach the finish line!
To save your design, click the “Save” button on the top left corner of the page. Then, click “Download,” select the file type and export it by clicking “Download” on the bottom. Wait for a while then you’re done!
There are also other options to share your design on Canva which include but are not limited to the following:
- Saving the design to Google Drive or Dropbox.
- Sharing the design directly to different social media platforms.
- Sending a shareable link to others for collaboration.
- Ordering prints straight from Canva which will eventually arrive at your doorstep.
Great job for making it here! You have come a long way and we will be finally at ease to let you explore on your own.
Conclusion
Now that this How to Use Canva for Beginners guide has taught you the fundamentals of Canva, you are now ready to take on a journey to become the best designer you will ever be. Don’t worry, you got this! Happy designing!
Common Questions about Canva
Yes, Canva is great for beginners. It’s user-friendly with a simple interface and plenty of templates, making it easy to create designs without prior experience.
You can start creating basic designs in Canva within a few hours. Becoming proficient might take a few weeks of regular use, but you can learn the essentials very quickly.
To practice on Canva, start by exploring its templates and tools. Try recreating designs you like, use different features for various projects like posters or social media posts, and experiment with fonts, colors, and layouts.
Canva is used for creating graphics such as presentations, posters, documents, social media graphics, and other visual content. It’s versatile, catering to both personal and professional design needs.
